The default mouse cursor scheme in Windows is Aero White, which is available in three sizes – system scheme, large and extra large.
You have three additional scheme sets – Windows Standard, Windows Black, and Windows Inverted. The Windows Standard in the old non-Aero Windows XP styled scheme, the Windows Black is the inverted variation of Windows Standard, and the Windows Inverted is an inverted cursor scheme that adapts colour according to the background of the cursor. All three of these are available in all three sizes. There is also the Magnified scheme.
The default Windows cursor scheme may seem boring after some time. As mentioned above, you have some additional themes but they are all the variation of the same default white scheme. To make things spice, you need to download and install third-party mouse cursor schemes for Windows. Here is how to do that.
Downloading the Cursor Scheme
The best source for downloading high-quality Mouse cursor schemes directly from its creators is through DeviantArt.com. Here is their dedicated Windows Cursor schemes page:
https://www.deviantart.com/customization/skins/windows/cursors/whats-hot/
Extract the Cursor Scheme
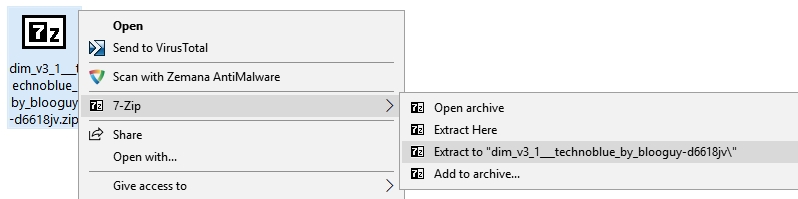
The cursor scheme will come in compressed packages – .zip or .rar. In order to extract them, you need you have a compression software installed on your computer to extract these files. Once you have download your cursor scheme, extract it by right clicking on it and selecting your compression software.
Installing the Cursor Scheme
The mouse cursor scheme can be installed in two ways – Automatic or Manual
- In the Automatic mode, all is done in one go with the help of an .inf file.
- In the Manual mode, you have to browse for each file that you want to use as a cursor icon for various cursor actions such as Normal Select, Busy, Working in Background, etc.
Installing Cursors Automatically
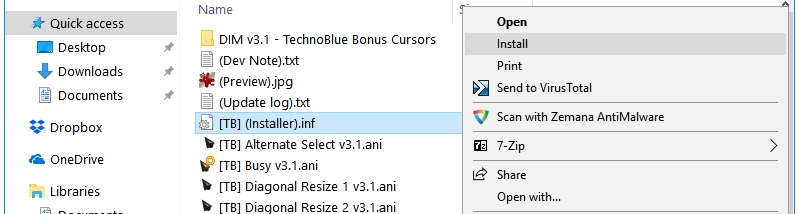
Most of the times, you will have an .inf file included in the cursor scheme package, this file is the cursor scheme installer. Running this file will copy and the paste the cursor files in the Windows cursor directory, which is C:\Windows\Cursors. You can inspect the code of .inf file by right clicking on it and opening with Notepad.
Installing Cursors Manually
Type and open pointer in the Windows search bar, it will open the Mouse Properties window. Click on the Pointers tab.

Now, click the Browse button to browse for mouse cursor icon for each of the cursor actions such as Normal Select, Busy, Working in Background, etc. Only .ani and .cur icon files are supported. Click Apply and then OK button to finish the manual install and activation process.
Activating the Cursor Scheme
The .inf installer will only copy-paste the cursor scheme in the Cursors directory, it will not activate it. That, you will have to do manually. You have to open the Mouse Properties to activate the newly installed cursor scheme.
Type and open pointer in the Windows search bar, it will open the Mouse Properties window. Click on the Pointers tab.
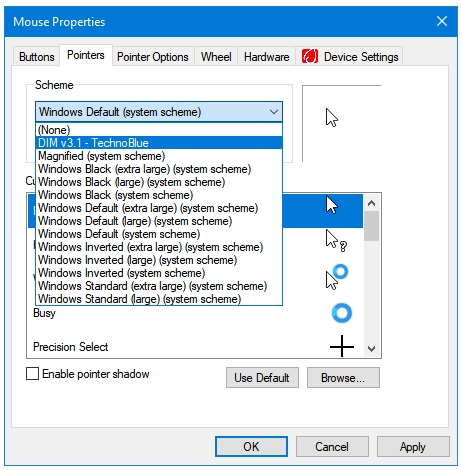
Click the dropdown menu under Scheme section. It will display all of the available Cursor schemes. Select the one that you want to install. Complete the process by clicking Apply and then OK.
There you have it, your new cursor scheme installed.
Related Posts: