Windows To Go
The Windows To Go feature allows you to Install and Run the Windows Operating System from a USB flash drive. Windows To Go is not a Windows Installer, it is a complete bootable operating system (with some exceptions).
A bootable installer an external disk or drive that you use to install the operating system on your internal Hard Disk drives whereas a bootable operating system boots or runs from the external USB drives. Defining in a couple of words, a Windows To Go device is a Portable Computer.
Microsoft launched the Windows To Go feature with the release of Windows 8.
Things Required for Creating a Windows To Go USB Drive
- Program Used: Rufus
The program used to create the bootable disk is Rufus; you can download it from its official website here:
https://rufus.akeo.ie/
- Minimum USB Size Required: Use at least a 16 GB USB to create a Windows To Go drive. The recommended size is 32 GB.
- OS Required: Because Windows To Go was launched with Windows 8, you need to be running at least Windows 8 to be able to use this option on Rufus.
How to Create a Windows To Go USB Drive Using Rufus
Note: Microsoft recommends using only the Microsoft Certified Windows To Do drives for creating a Windows To Go drive. Your drive may not work properly if you are trying this process on a non-certified USB drive.
Step 1: Open Rufus.
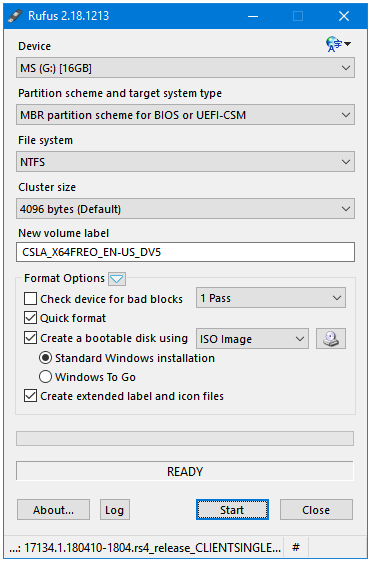
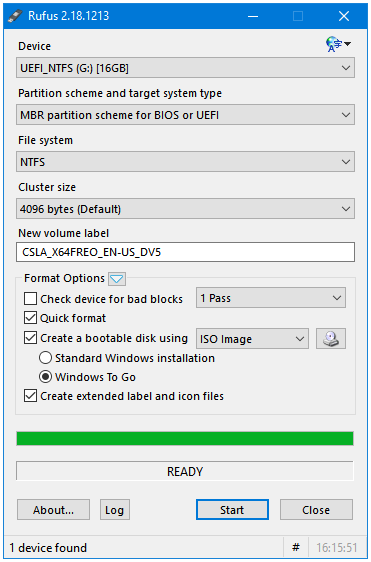
- Select the USB drive that you want to use as your Rescue Disk from the Device drop-down menu.
- Under Partition scheme and target system type, select MBR partition scheme for BIOS or UEFI. The USB created will work with both types of systems – older BIOS, and newer UEFI.
- Under the File system selection setting, select NTFS. The FAT32 (File Allocation Table) file system has a file limit of 4GB and a partition limit of 32GB. While you may not be creating a 32GB partition on this drive, you could be copying a file that is more than 4GB in size; the current wim file present inside Windows ISO is 3.34 GB in size. So, use NTFS to be on the safe size, plus the NTFS (New Technology File System) is made by Microsoft for the Windows NT family, so there you go.
- Keep the Cluster size value to its default setting, which is 4096 bytes (Default).
- The New volume label field changes automatically during the rescue disk creation process.
- Under Format Options, check all of the settings.
- Check device for bad blocks – Do not use this option. When used, it will check your USB device for any hardware defects that it may have. But, it takes a lot of time to do so, hence not recommended.
- Quick format – Rufus will perform a quick format to remove any previously stored files on your USB device.
- Create a bootable disk using – Set this to ISO Image.
- Create extended label and icon files – Be default, you can type only a limited number or letters in naming your USB device. However, it is possible to type a longer name. This option will let you do that. You will also get a bootable disk icon for your USB device.

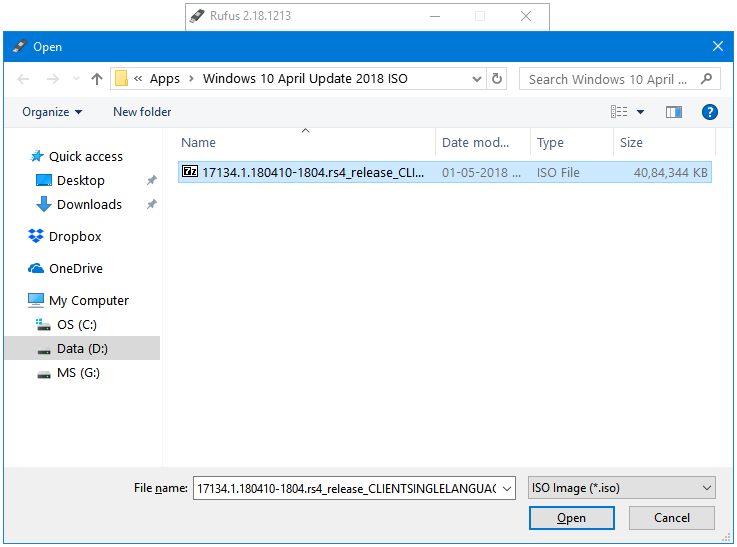
Step 2: Click on the button with the Disk icon. It will open a file explorer window to browse for the Windows ISO file. Select the Windows ISO file, and click Open.
Step 3: You’ll notice that the Volume label automatically changes. You can enter your custom name here. I’m going to call it Windows 10 To Go.
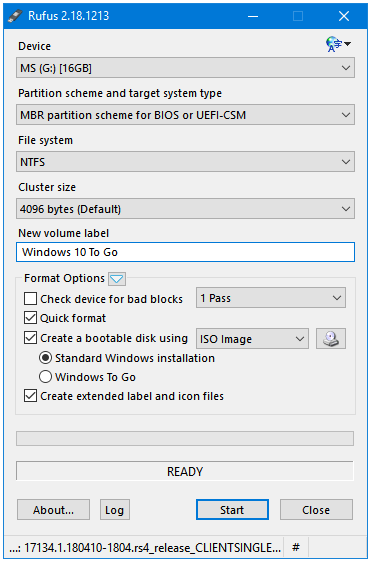
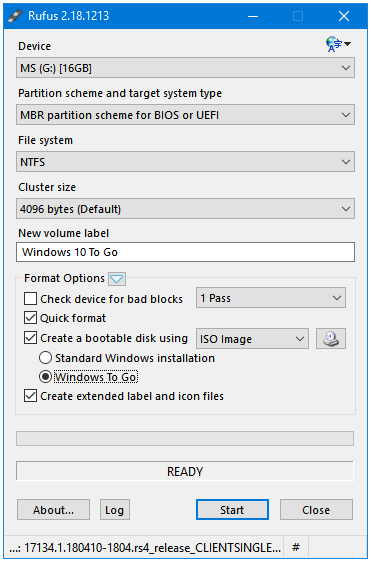
Step 4: Another thing that happened after selecting the Windows ISO file is that there are now two options under Create a bootable disk using. By default, the first option called Standard Windows installation is selected. Click on the radio button of the second option called Windows To Go. Click on the Start button to start the bootable disk creation process.
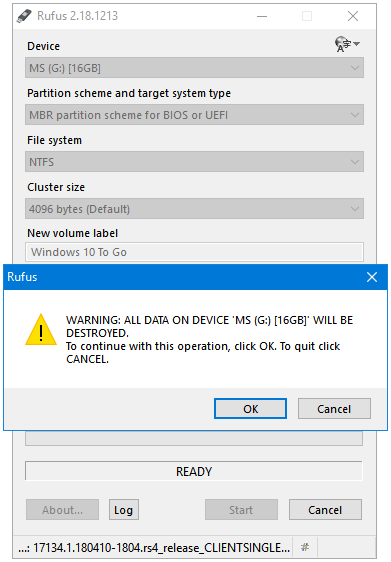
Step 5: All data on the device will be deleted if you continue with the process, so make sure that you have selected the right USB drive. Click OK to process further.
Step 6: This is going to take a lot of time. Keep Rufus running in the background.
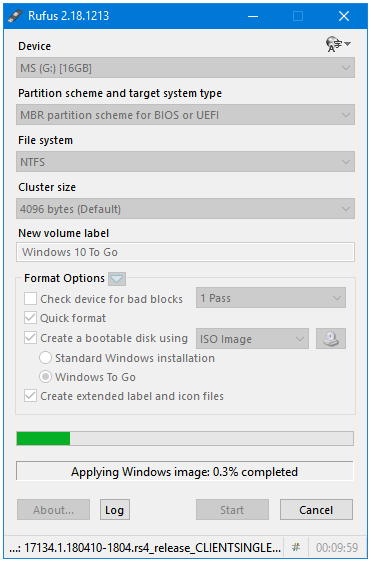
Step 7: Rufus will display the READY message in its status bar once it has finished the process.
Your Windows To Go Drive is now ready.