The Kaspersky Rescue Disk is an emergency rescue disk utility that can be used to create a bootable CD/DVD, or a bootable USB drive to recover your computer for malware infections. It not only scans and rescues your system, but also lets you do other file management tasks such as transferring your important files from the infected host computer to a removable media or other storage options with the help of its File Manager program. There is a Web Browser as well for getting help while you are inside the recovery environment. Another important tool is the Registry Editor that can be used to fix Windows Registry related issues.
The rescue environment is based on Linux, and you get a variation of KDE Desktop Environment. The main interface of the Kaspersky Rescue Disk hasn’t been updated since the version 10, but that’s not an issue here because we are concerned with the antivirus database, and not the interface. The Rescue Disk updates the database and then scans your system, so you’re getting the latest virus definitions.
Before we start the Kaspersky Rescue Disk creation process, we need these two files – the Kaspersky Rescue Disk ISO file, and Kaspersky Rescue Disk 10 Utility.
Download Kaspersky Rescue Disk ISO:
The ISO file can be accessed at this page:
https://support.kaspersky.com/viruses/rescuedisk
Click the Download button to start downloading the file.
Or, you can download the file directly from the following official link:
http://rescuedisk.kaspersky-labs.com/rescuedisk/updatable/kav_rescue_10.iso
Download Kaspersky Rescue Disk 10 Utility
The Kaspersky Rescue Disk 10 Utility can be downloaded from the following official link:
rescuedisk.kaspersky-labs.com/rescuedisk/updatable/rescue2usb.exe
Creating Kaspersky Rescue Disk for Windows
Let’s start the process.
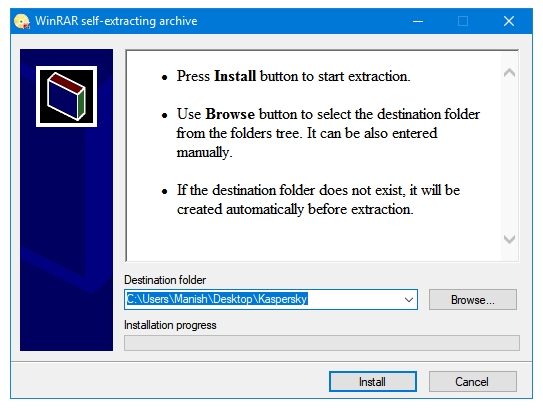
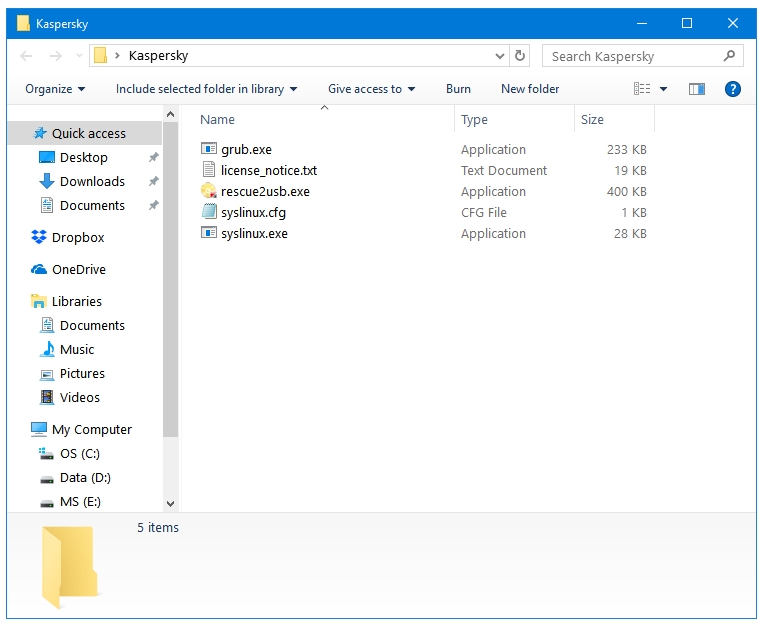
Step 1: Open the Kaspersky Rescue Disk 10 Utility (rescue2usb.exe), and extract it by pressing the Install button. This will extract the files necessary to create the rescue disk into a folder named Kaspersky.
Step 2: Now, go to extracted folder, and open the file named rescue2usb.exe. This will open the Kaspersky USB Rescue Disk Maker tool.
Step 3: Click on the Browse button on the Kaspersky USB Rescue Disk Maker tool to browse for the Kaspersky Rescue Disk image file.

Step 4: Select the Kaspersky image file name kav_rescue_10.iso, and click Open.

Step 5: Now, select the USB medium that you want to use as the Recovery Disk. Make you that you select the right USB drive because all of the data present in it will be deleted.
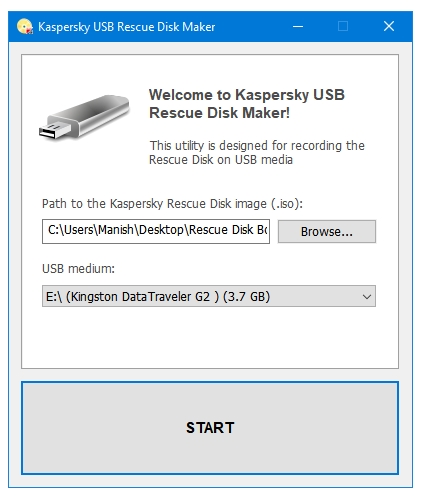
Step 6: Now, all you have to do is click that huge button at the bottom that says START.
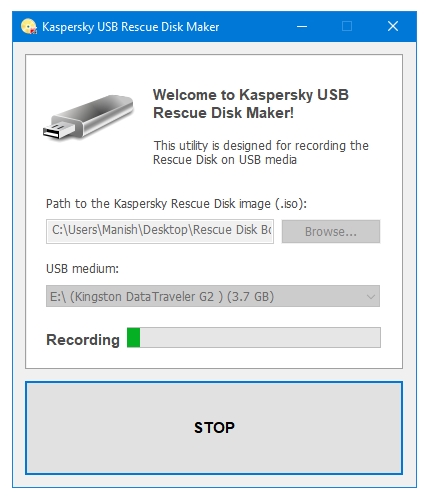
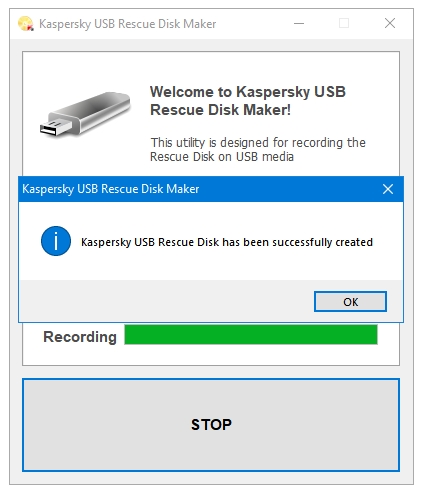
Step 7: After a few minutes, you will be presented with the following message – Kaspersky USB Rescue Disk has been successfully created. Click the OK button, close the program, and remove your USB drive.
Your Kaspersky USB Rescue Disk is now ready.