A Windows password is the first step towards protecting your data. Even if there is nobody else in your house or living location that uses computers or has any interest in your computer data, you should keep the login password enabled. It adds another layer of protection to your computer data.
But, there can be some drawbacks of using passwords as well. It delays loading of Desktop. Other issue is the type of password used. In Windows 8/8.1, and the earlier versions of Windows 10, Microsoft required the user to have Microsoft account to activate his new Windows PC. So, a user has to use his Microsoft account password to log into his computer every time. This password is the same one that is used in other Microsoft services such as Outlook. Instead of completely disabling the password protection, you should consider creating a local account, and using that password to log into your computer.
If you would like to know how to disable it, and re-enable it then here it is.
Enable or Disable Login Password on a Windows PC
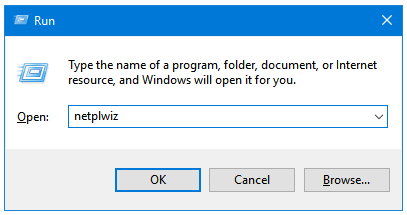
Step 1: Press Windows + R keys together to open the Run dialog box. Enter netplwiz in the text field, and then click OK. This will open the User Accounts Settings window.
Step 2: In the User Accounts Settings window, click on your account name. There you’ll find an option saying User must enter a user name and password to use this computer. This option is enabled by default. Untick the checkbox to disable the login password.
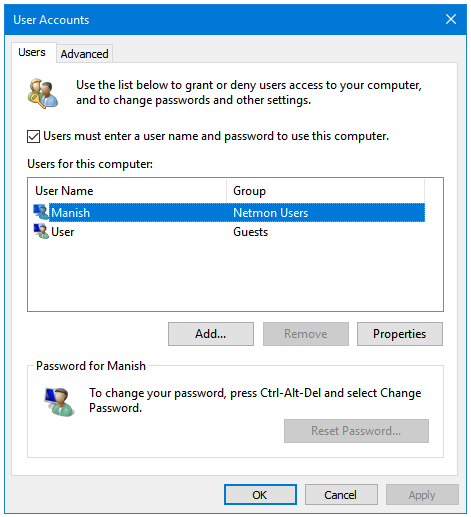
If the login password is currently disabled, and you want to use a password at the time of logging into Windows, then tick the checkbox.
Step 3: Click on Apply and then OK to apply changes.
Next time you start your computer, you’ll see these changes implemented.