TestDisk
TestDisk is an open-source program, and is released by its development company, CGSecurity, under the GNU GPL license. There are no data recovery limits, no pro versions, no ads, no promotions in this great program. Using TestDisk can prove to be a daunting task for the first time users as it works only in a command prompt/terminal window. This program has no colourful icons, animations, or other inviting GUI elements that most users like.
It is a true cross-platform software – available for DOS, Windows 9X family, Windows NT4, 2000, XP, 2003, Vista, 2008, 7, 8, 8.1, 10, Mac OS X Intel, Mac OS X PowerPC, Linux, FreeBSD, NetBSD, OpenBSD, and SunOS.
The data recovery can take anywhere from a few minutes to a few days depending on the state of the disk being recovered and the specifications of the host computer.
TestDisk Homepage: https://www.cgsecurity.org/wiki/TestDisk
Table of Contents
- Benefits of Using TestDisk
- TestDisk can do These Things
- How to Run Test Disk in Windows
- Best Way to Run TestDisk
- Things Required for Data Recovery
- Use TestDisk to Recover Lost Data and Partitions from Corrupt and Damaged Disks
Benefits of Using TestDisk
- Small size
- Portable
- Cross-platform
- Open-source
- No Malware, Ads, or Promos
- Thorough Disk Scanning and Data Recovery
TestDisk can do These Things
- Fix partition table, and recover deleted partitions. Fix FAT tables, and MFT using MFT mirror.
- Recover FAT32, and NTFS boot sector from its backup.
- Rebuild FAT12/FAT16/FAT32, and NTFS boot sector.
- Copy files from deleted FAT, exFAT, NTFS, and ext2/ext3/ext4 partitions.
- Undelete files from FAT, exFAT, NTFS, and ext2 filesystem.
- Locate ext2/ext3/ext4 Backup SuperBlock.
How to Run TestDisk in Windows
- Download TestDisk from their official download page mentioned below:
https://www.cgsecurity.org/wiki/TestDisk_Download - Extract the downloaded TestDisk Zip (.zip file).
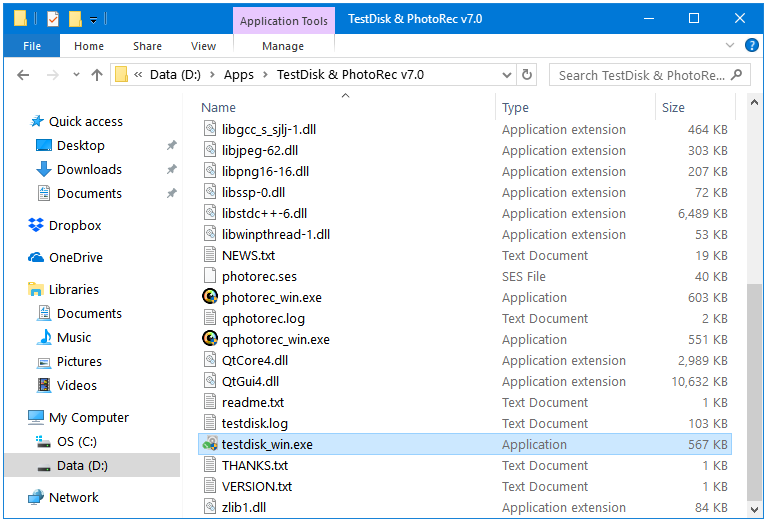
- Find and open the testdisk_win.exe file to start TestDisk.
Best Way to Run TestDisk
- If you are in the early stages of disk loss, or if you have accidentally deleted or lost a partition then you can run TestDisk from within windows.
- If the disk is unbootable, then you have to boot your computer using a Linux Live USB. Install and run TestDisk from that Linux Live USB.
- If the corrupt disk is actually a removable media like an External HDD, or a USB flash drive, then you can just connect it your computer, and start using it.
Things Required for Data Recovery
- A Host Computer to run the Data Recovery program.
- The Damaged or Corrupt Storage device.
- TestDisk & PhotoRec.
- A Hard Drive Adaptor or Enclosure if the disk in question is internal in nature i.e., internal Desktop or Laptop Hard Disks of other computers.
- Electricity backup. Sudden Interruption in the recovery process can be bad for both, the host computer as well as the damaged storage device. So make sure you have some sort of power backup. In the case of a power cut, you should be able to pause or stop the Scanning and Data Recovery process yourself.
Use TestDisk to Recover Lost Data and Partitions from Corrupt and Damaged Disks
WARNING
DO NOT STORE THE RESTORED FILES ON THE SAME PARTITION WHOSE FILES YOU ARE RECOVERING. DOING SO CAN OVERWRITE THE PREVIOUSLY DELETED FILES RESULTING IN CORRUPTED FILE RECOVERY.
Step 1: The first step is creating a Recovery location for your data. I have created a folder called Recovery in D:\ drive to use as the destination for recovered files.
Step 2: Open the testdisk_win.exe file from the extracted TestDisk folder.
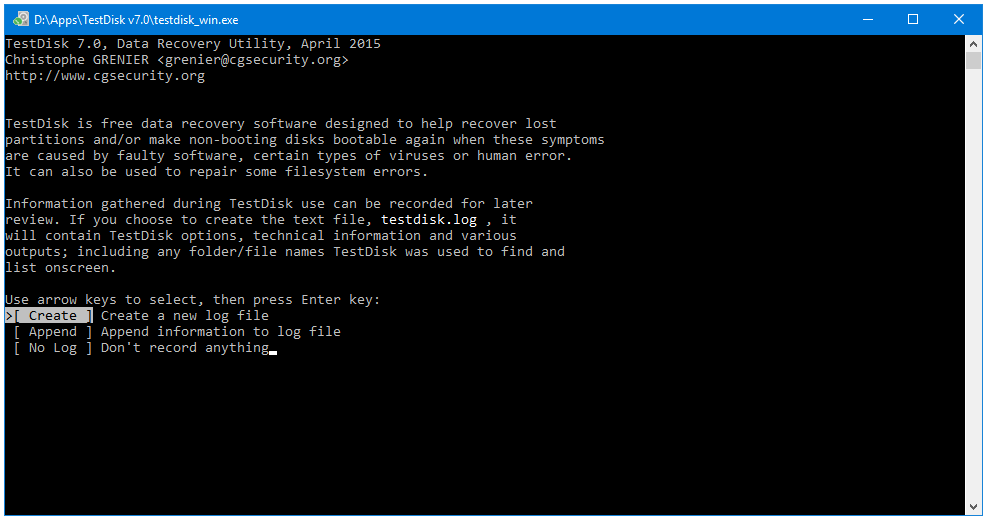
Step 3: The first step is creating a log file for the program. Press Enter to select the first option, and Create a log file.
Step 4: In the next screen, select the Hard Drive you want to recover your data from. You can use Up and Down arrow keys to select the options. All four of the Arrow keys, Backward, Forward, Up, and Down, are used in this program.
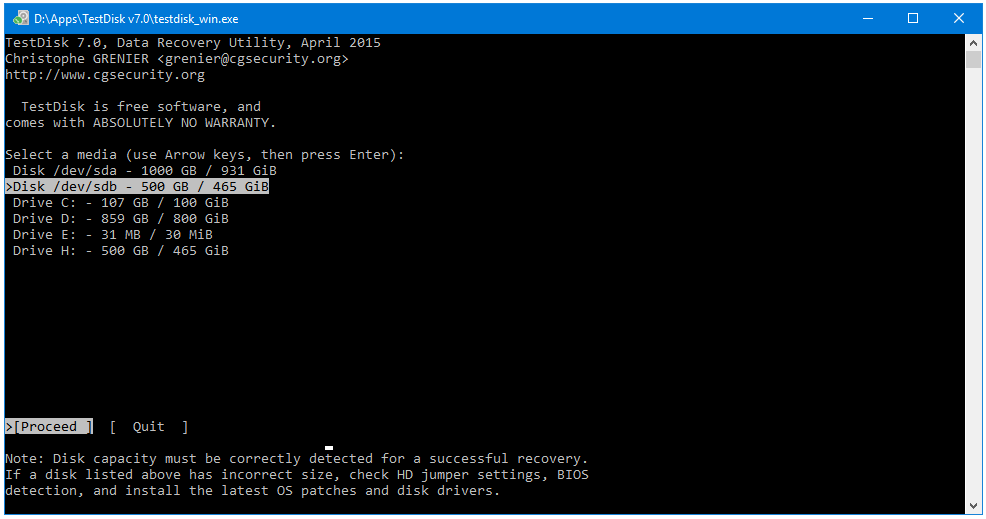
TestDisk will show all of the connected Hard Disk as well as the partitions (Drives) present inside of them. If you only want to recover a Drive then you can navigate to that drive in the list, and press Enter to Proceed further. And, if you want to recover data from the entire Disk then use the Disk option.
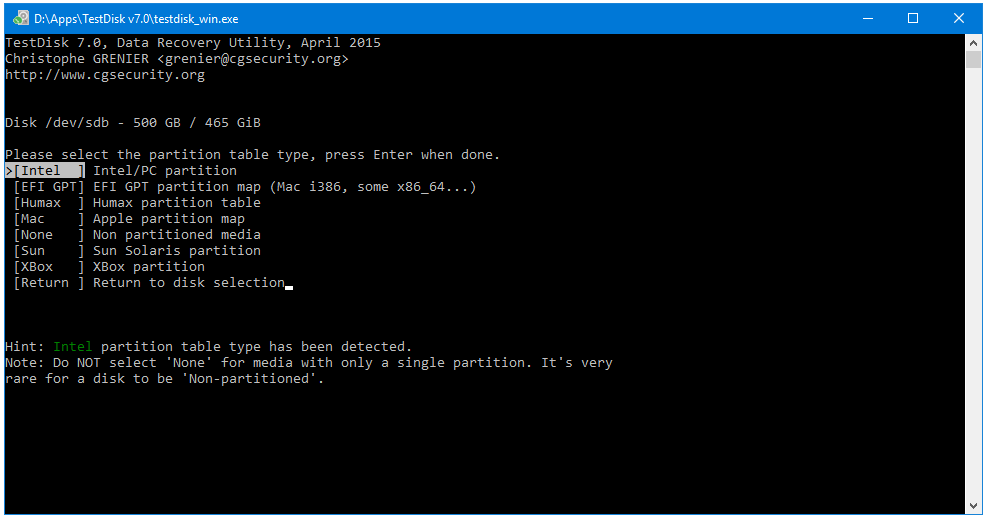
Step 5: TestDisk will automatically detect the type of partition table on your disk. Press Enter.
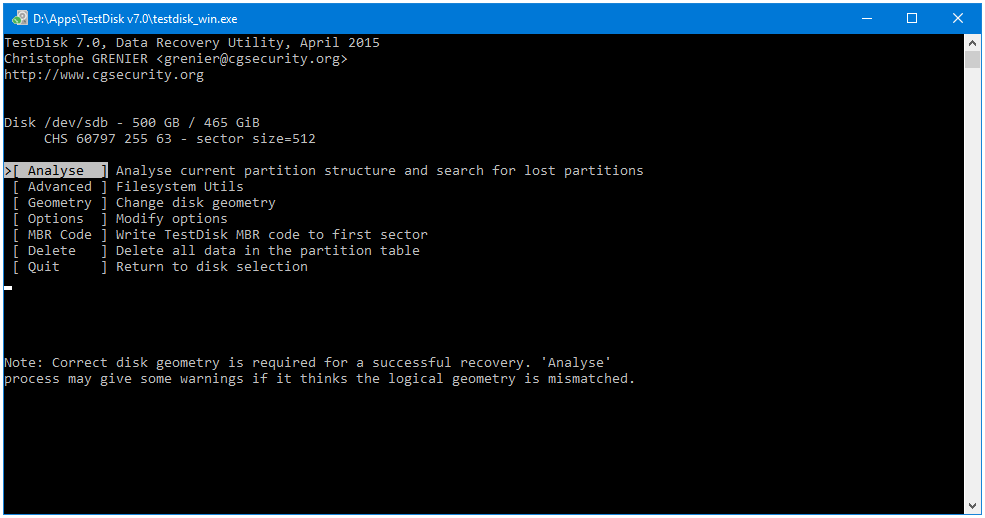
Step 6: Analyse is the first option in the next screen, click Enter to start analysing your disk. There are some advanced tools available in this window. You can check them if you are comfortable with that.
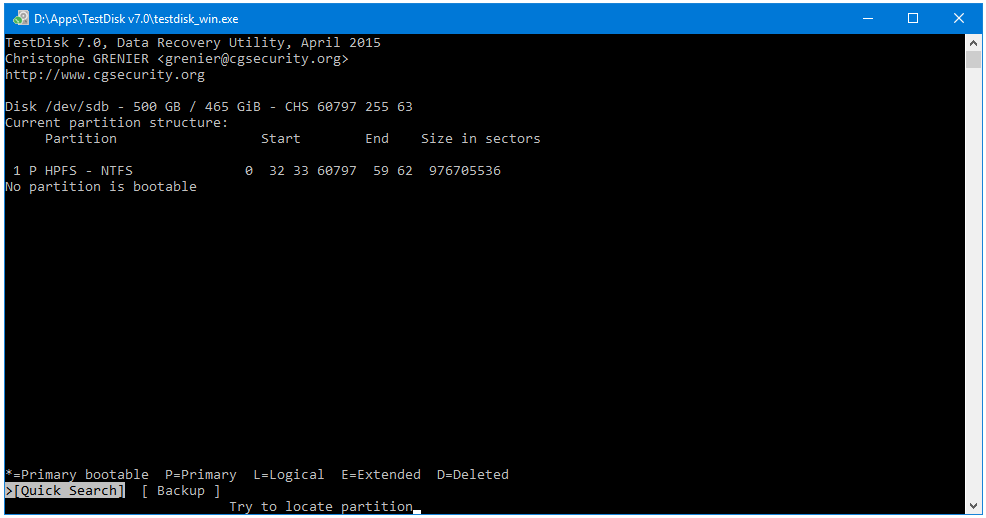
Step 7: After Analysing, TestDisk will display errors related to your disk in the following window. Quick Search will be selected option here by default. Press Enter to do that.
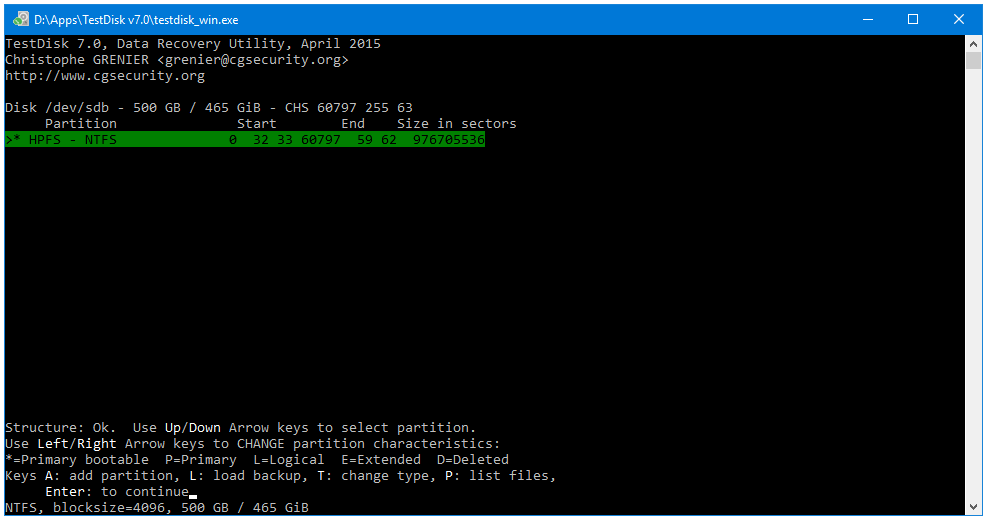
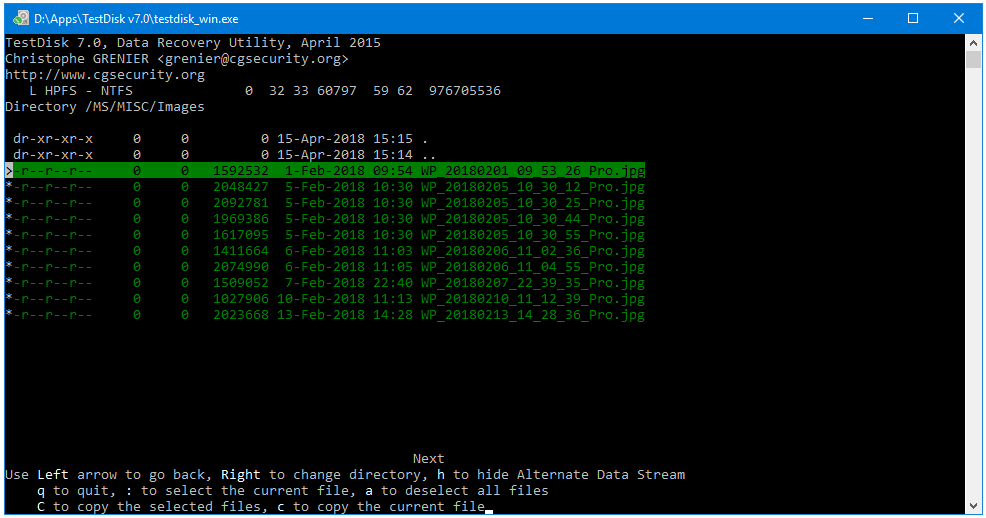
Step 8: Okay, so now we can access the disk and select files and folders that we want to recover. Press the P key to list the contents of your disk.
Step 9: Once you are inside the Hard Disk, TestDisk will start displaying the select files options at the bottom of the window.
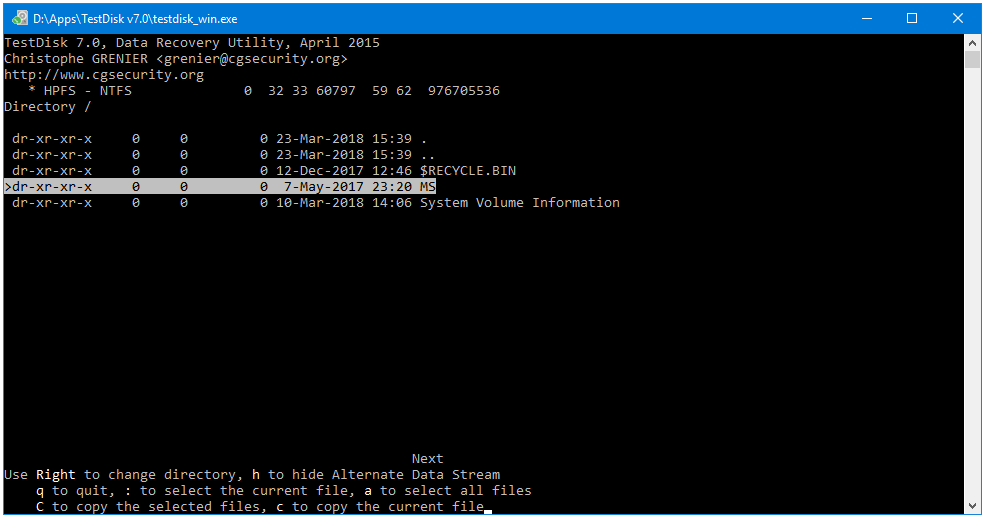
Step 10: Press : to select the current file, a to select or deselect all files, c to copy the current single file, and C to copy all of the selected files.
Step 11: When you have selected files or folders for recovery, TestDisk will automatically take you to the directory from where it is being run.
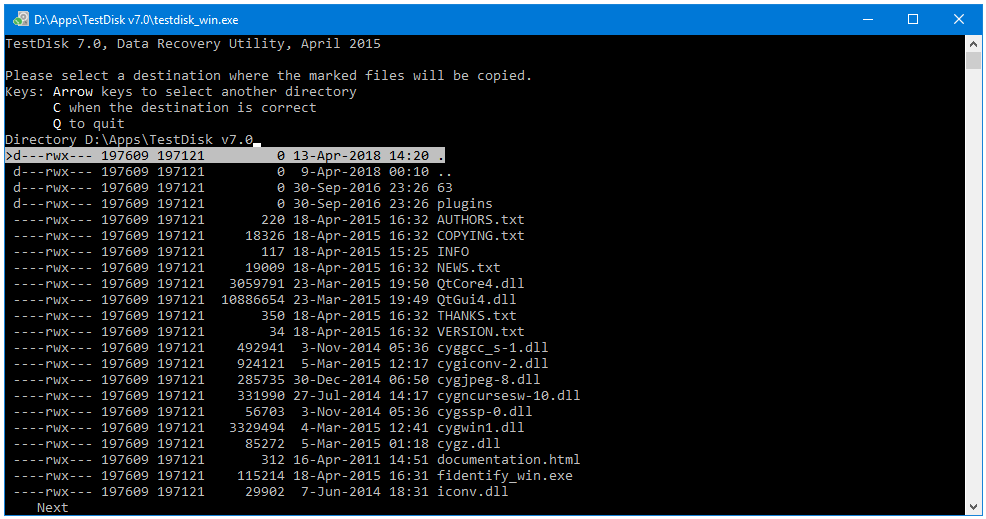
Step 12: Use the Arrow keys, Backward and Forward, to navigate to your recovery location.
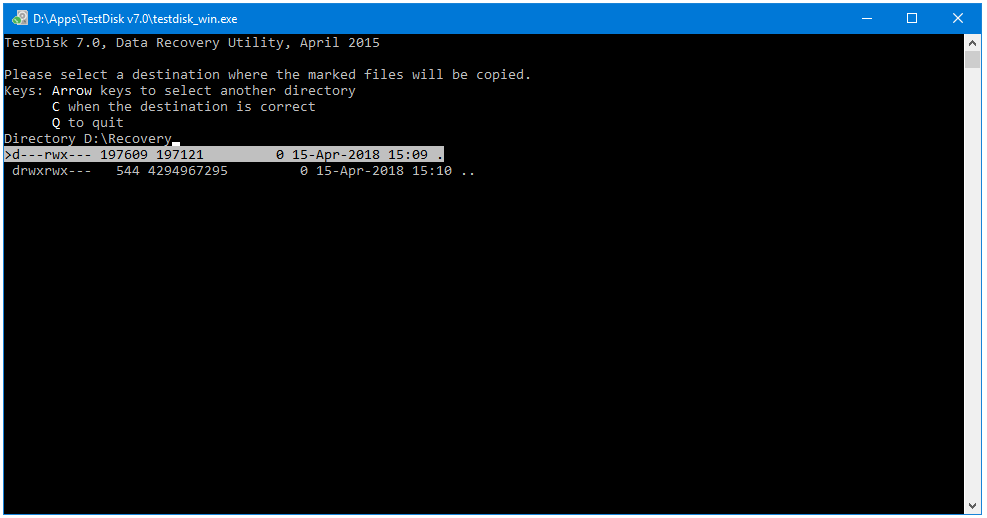
Step 13: Inside the recovery directory, press C to recover the selected files here in this directory.
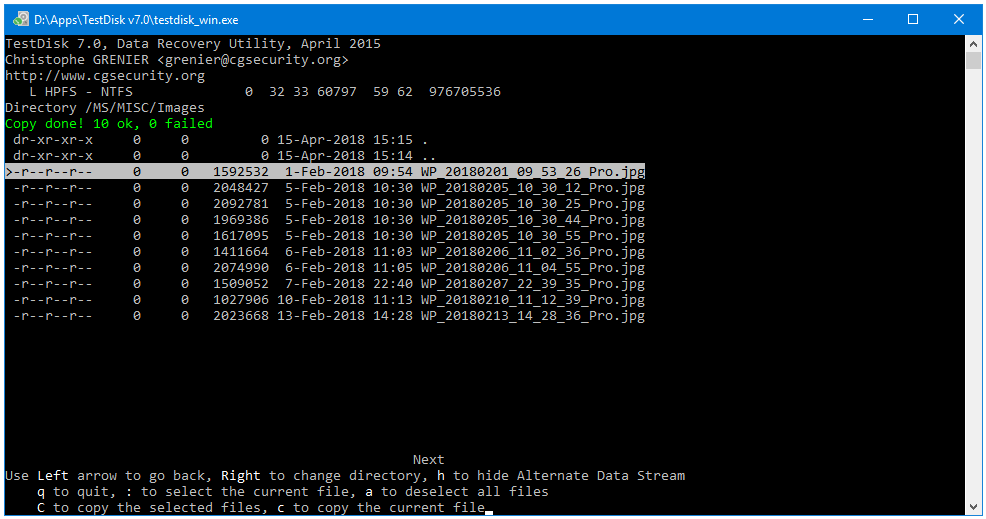
Step 14: Now, go to your Recovery folder that you created in Step 1. There, you’ll find your recovered data.
Step 15: Press Close (X) button to close TestDisk.