YUMI – Your Universal Multiboot Installer
YUMI – Your Universal Multiboot Installer is a portable bootable USB device creation tool that can create bootable USB drives from Linux Distribution image files, and various other System Utilities using their respective ISO files. YUMI is from the same developers who develop another bootable USB creation tool called UUI – Universal USB Installer. YUMI is an advanced version of UUI. In addition to all of the features and benefits of UUI, YUMI also lets users create a Multiboot USB. A Multiboot USB is a USB drive/device that contains more than one bootable operating system or System utilities in the same USB drive/device. One USB with multiple bootable programs in it makes for a great tool in one’s computer recovery toolkit.
Homepage: https://www.pendrivelinux.com/yumi-multiboot-usb-creator/
Installing first ISO file on USB Drive using YUMI in Windows
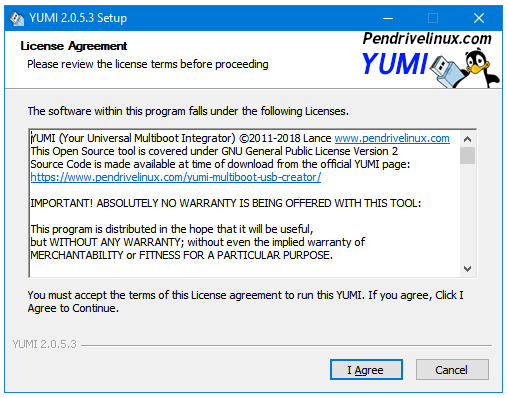
Step 1: Open YUMI – Your Universal Multiboot Installer. Click the I Agree button if you agree with the License Agreement of the program.
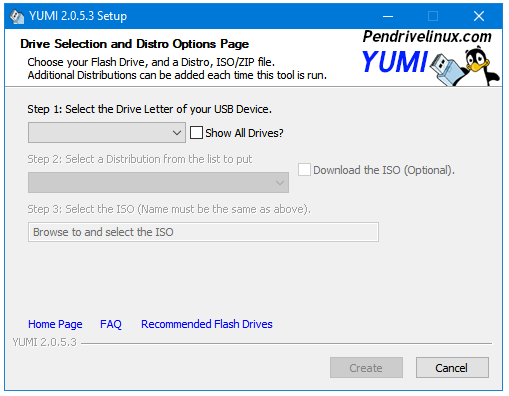
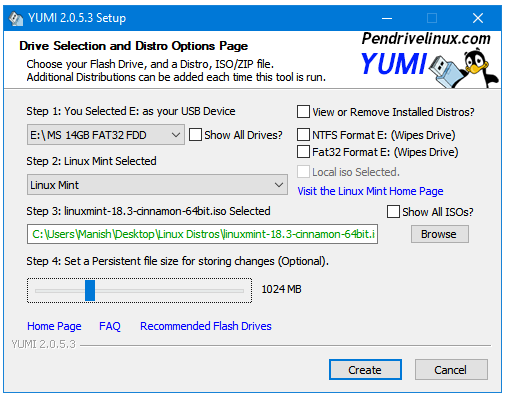
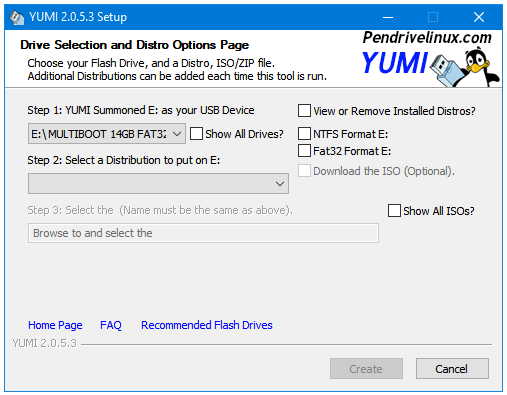
Step 2: The first step in YUMI is selecting the USB Device that you want to use with YUMI.
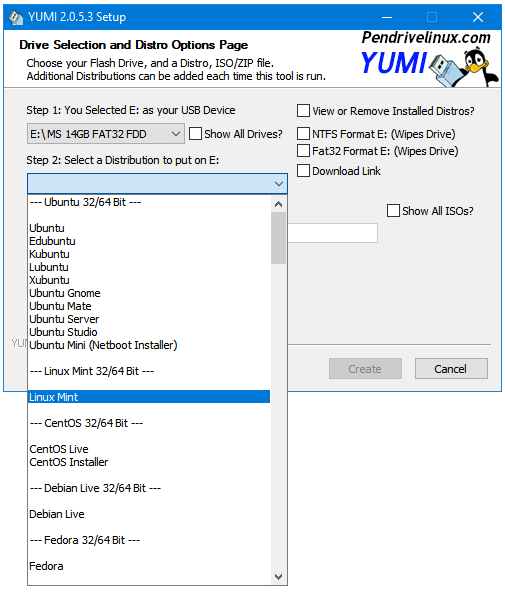
Step 3: Next, click on the drop-down menu to select the Linux distribution that you are going to use on your USB. If you do not find the option of the distribution that you want to use then select Try Unlisted Linux ISO, which is available at the bottom of the menu.
Step 4: The next step is to Browse for the ISO file. Click the Browse button to do that.
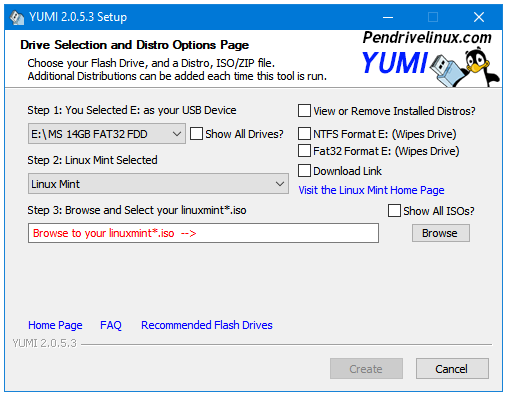
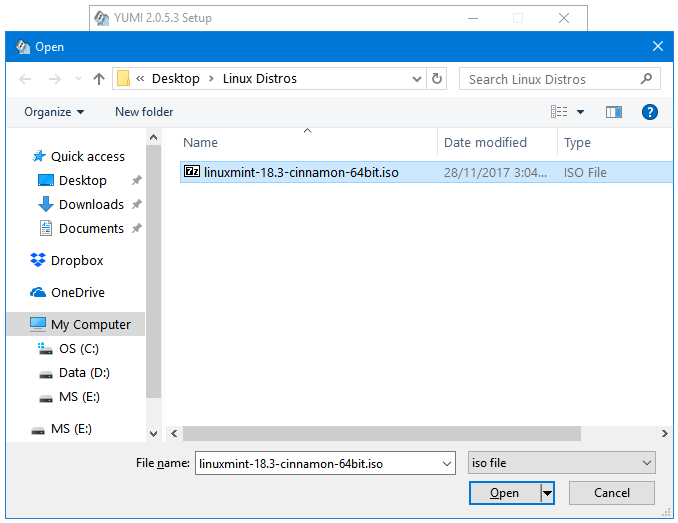
Step 5: In the Windows File Explorer browse window, locate your ISO file, and then click the Open button.
Step 6: You get the option to use Persistent space for the distros that support this feature. Linux Mint supports persistence so we get the option to choose a size for Persistent space. Click Create.
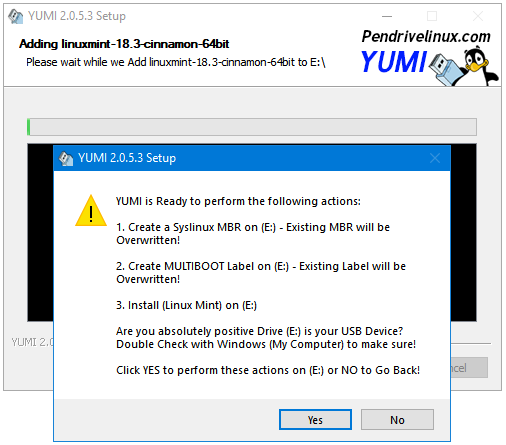
Step 7: Here’s your first warning message. Click Yes to proceed further.
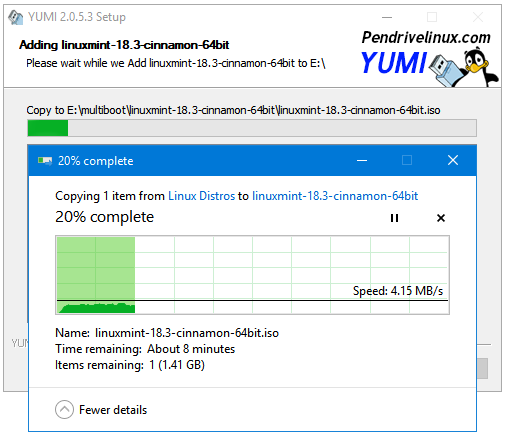
Step 8: YUMI copies the ISO file to the USB drive.
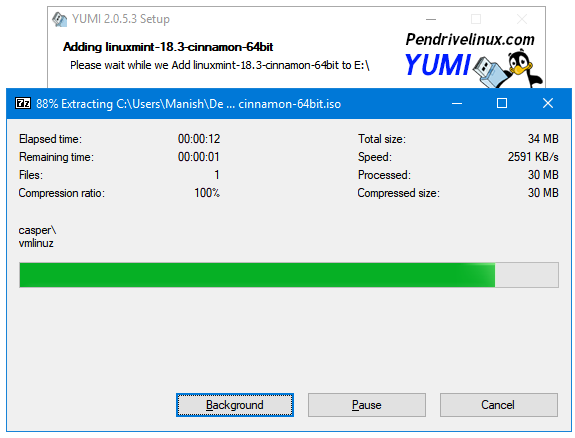
Step 9: YUMI extracts the contents of the ISO file.
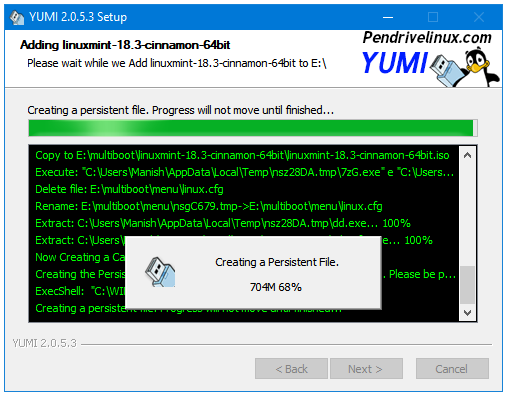
Step 10: If you selected Persistence then YUMI will now create a Persistent File now.
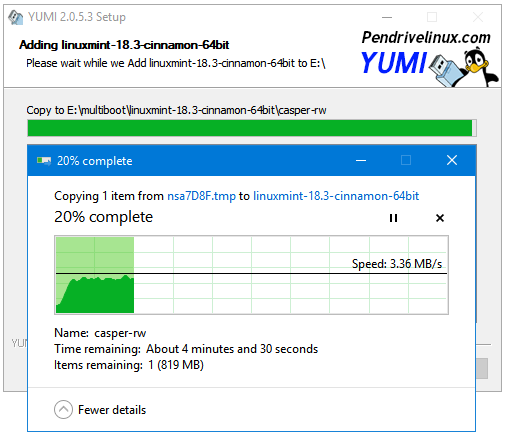
Step 11: Next, YUMI copies the Persistent File to the USB drive.
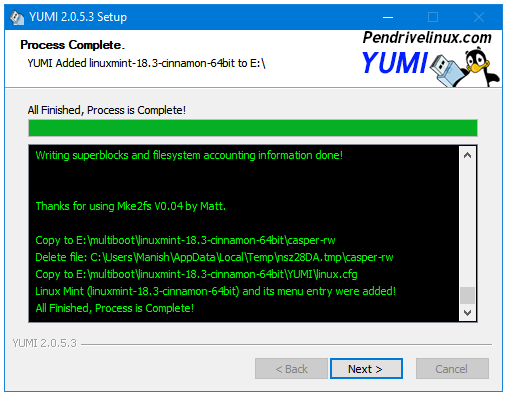
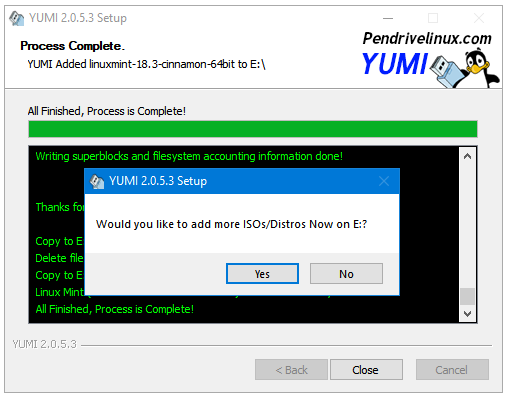
Step 12: The Phase 1 finishes here. YUMI displays the All Finished Process is Complete! message. Click Next to proceed further.
Installing additional ISO files on the same USB Drive using YUMI in Windows
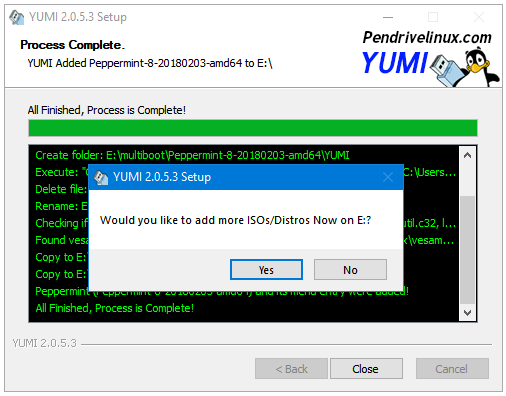
Step 13: Clicking on Next in the Process Complete. window in YUMI displays the following dialog box. Click Yes to add another ISO file. If you don’t want to add more ISO setups in the same USB then click No, and then Close to close the program.
Step 14: Now, we see the same window that we saw at the beginning.
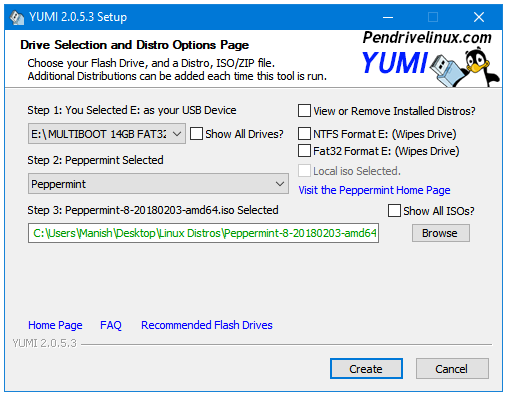
Step 15: Select the Linux distro or ISO name, browse for and select the second ISO file that you want to use on the same USB, and click Create. I’m using Peppermint OS as my second OS on the USB drive. You’ll notice that this time there was no Persistent file size option, and that is because Peppermint OS does not support the persistence feature.
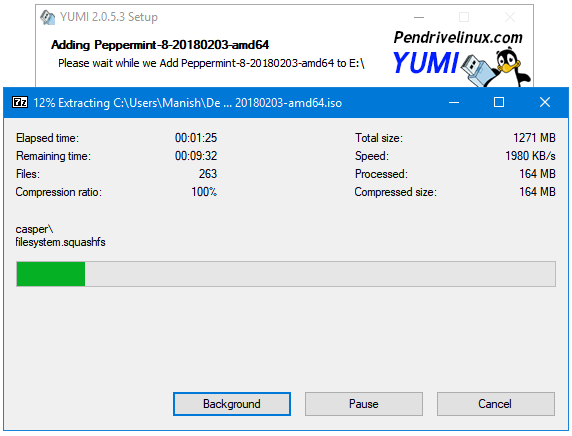
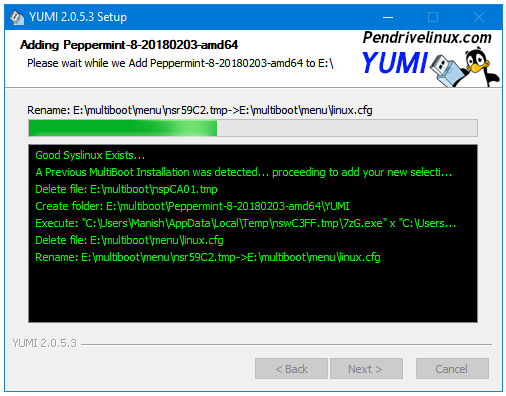
Step 16: YUMI starts copying and extracting the contents of the ISO file into the USB drive.
Step 17: YUMI updates the USB boot menu.
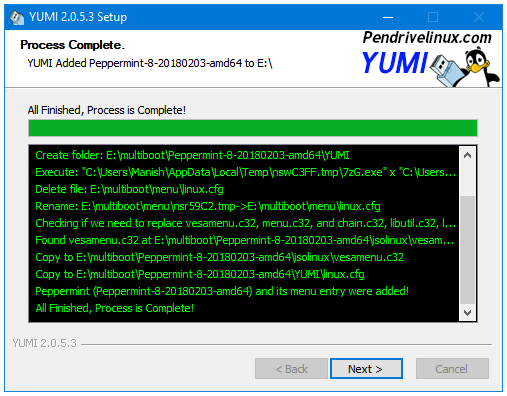
Step 18: There we see the Process Complete. window once again. Click Next.
Step 19: All right, this time I won’t be adding any more ISO files so I click No. If you want to add more then click Yes.
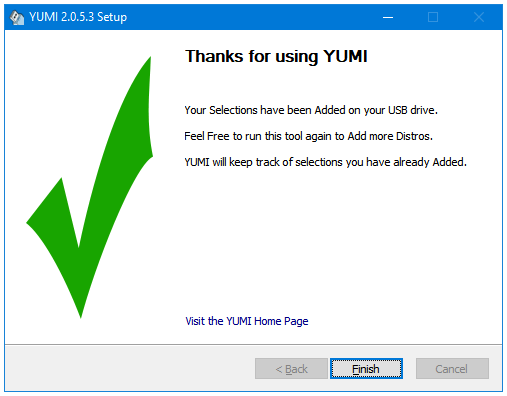
Step 20: All done. Click Finish to exit the program.
Safely remove your USB Device.
Related Posts:
- How to Create a Bootable Linux Live USB Drive with Rufus in Windows?
- How to Create a Bootable Linux USB Drive with UNetbootin in Windows?
- How to Create a Bootable Linux USB Drive with UUI – Universal USB Installer in Windows?
- How to Create a Bootable Windows 10 USB Flash Drive using Media Creation Tool?
- How to Create a Bootable Windows 10 USB Drive using ISO file?