Windows HomeGroup
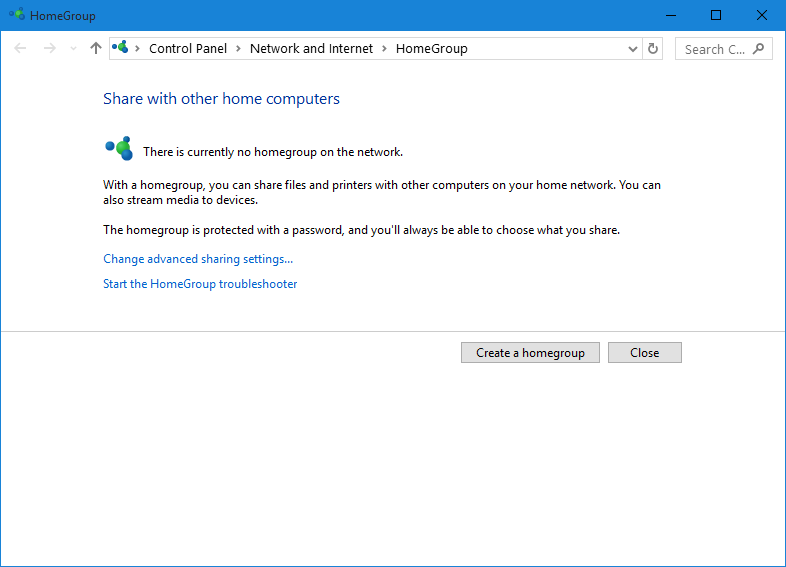
HomeGroup is an important Networking feature in Windows. The users of a HomeGroup can share various types of files, folders, and devices such as printers with the computer on the same local network connected through the HomeGroup feature. HomeGroup was introduced with Windows 7 in 2009.
Create or Join a HomeGroup in Windows
Step 1: Press Windows + E keys together to open Windows File Explorer.
![]()
Step 2: Click on the HomeGroup icon in the navigation pane to open the HomeGroup main window. Click on the Create a homegroup button to start the HomeGroup wizard.
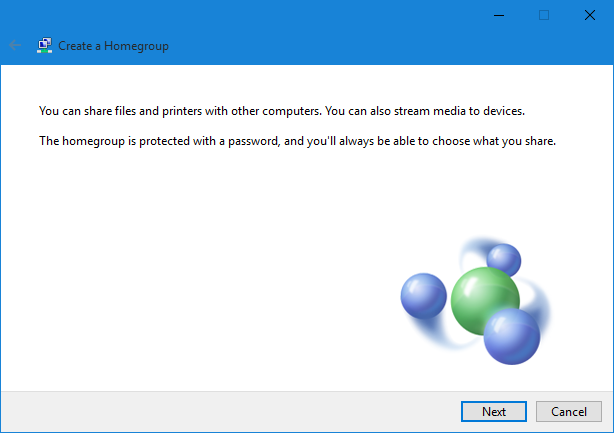
Step 3: Click Next.
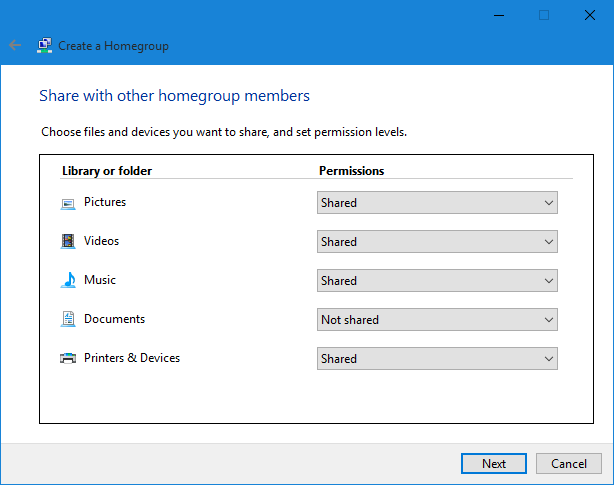
Step 4: Select the Library folders, and Printers & Devices that you want to share. Then, click Next.
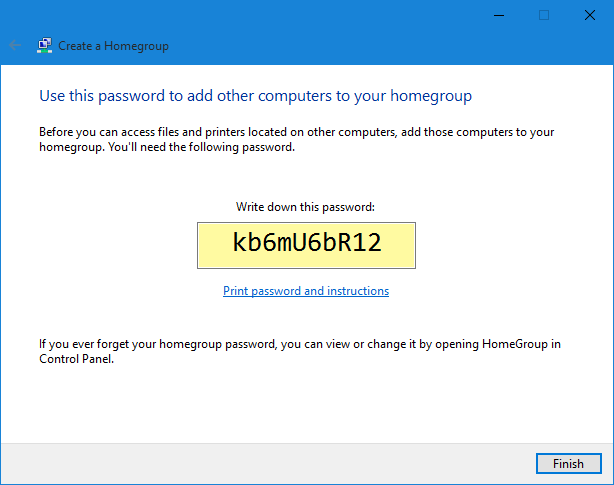
Step 5: Write down your HomeGroup password. Click the Finish button to close the HomeGroup wizard.
Now, you have created a HomeGroup.