How To Share Your Host Computer’s Files & Folders with VirtualBox Guest OS
VirtualBox is a cross-platform open-source hypervisor software that lets the users run multiple operating systems within their host operating system. The Shared Folders feature lets the Guest Machines access files and folders from the Host Machine. To enable the Shared Folder feature, you need to install the VirtualBox Guest Additions CD Image companion program.
Follow these Steps to Enable the Shared Folders Feature in VirtualBox
Step 1: Open VirtualBox.
Step 2: Install Guest Additions.
Read the following post to know How to Install Guest Additions in VirtualBox.
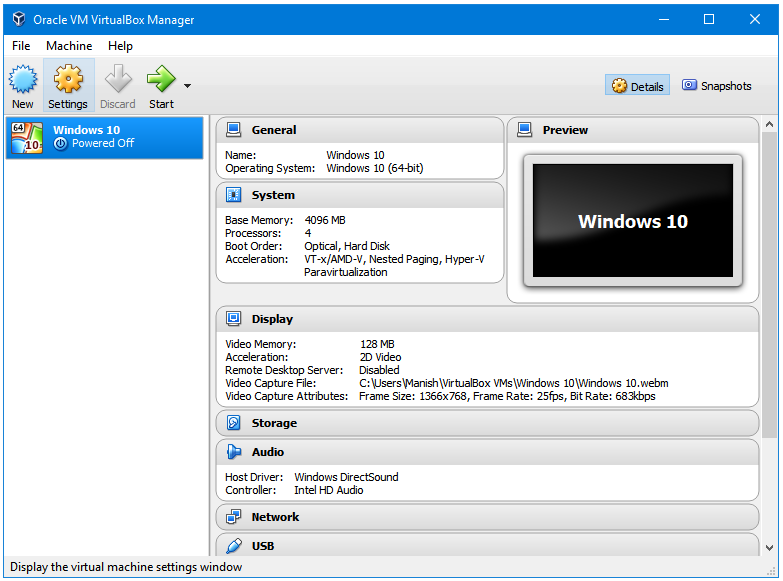
Step 3: After installing Guest Additions, the next step is to start the Guest Machine with which you want to share the Host Machine folders. Select the Guest Machine, and then click on the Settings button on the Toolbar.
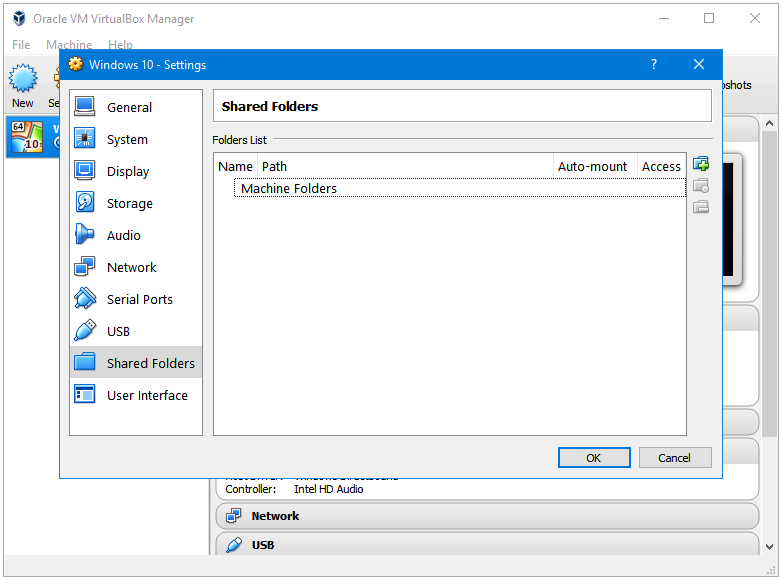
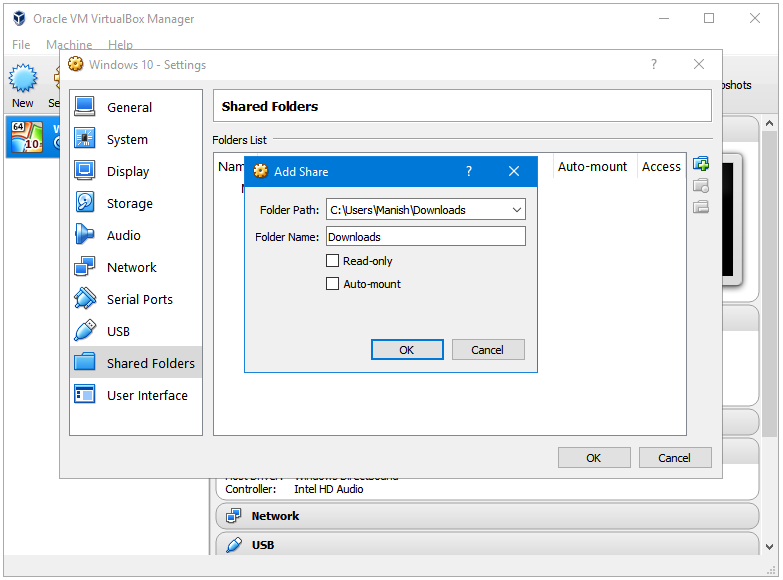
Step 4: In the Settings window, click on the Shared Folders side tab. In Shared Folders options, click on the +Folder icon; it will open the Add Share window.
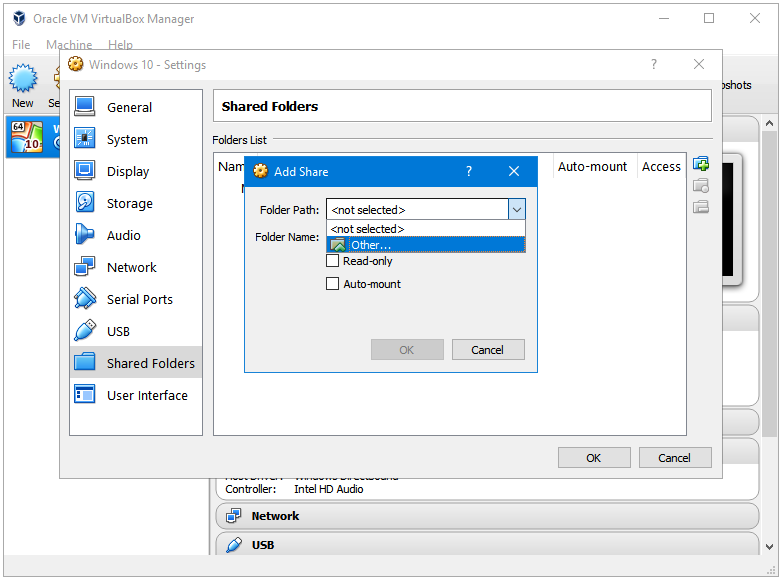
Step 5: In the Add Share window, click on the Other… link in the Folder Path: drop-down menu. It will open the File Explorer browse window.
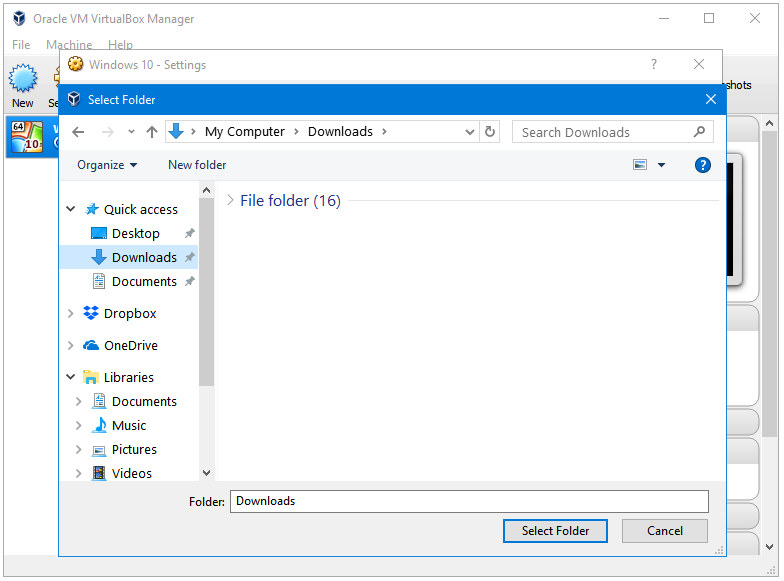
Step 6: Browse for the Host Machine folder that you want to share with your Guest Machine. Go inside that folder, and then click the Select Folder button.
Step 7: Now, you’ll see that both Folder Path: and Folder Name: entries are filled. Click OK.
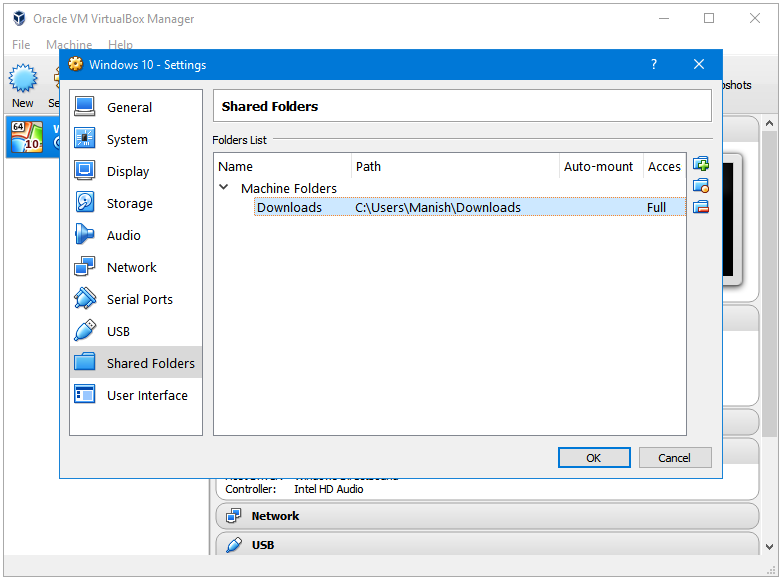
Step 8: Click OK again to close the Settings window.
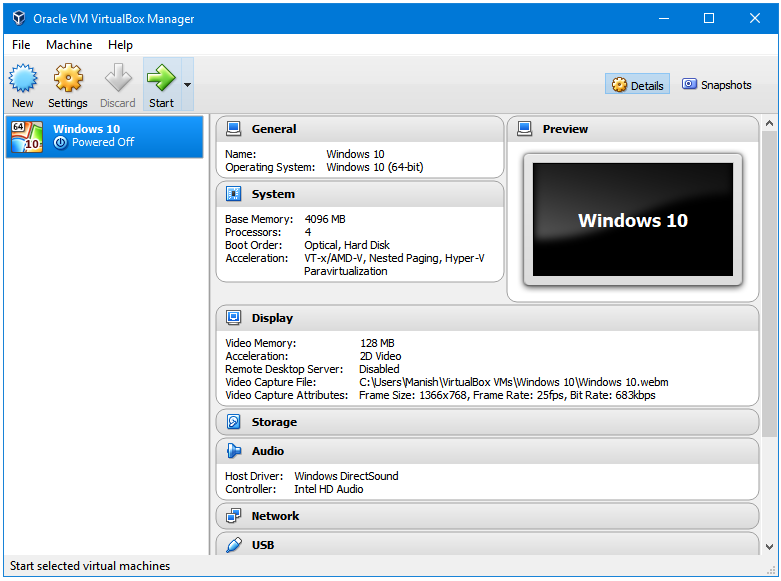
Step 9: Now, start the Guest Machine by clicking on the Start button in VirtualBox Toolbar.
Step 10: Open the File Explorer in the Guest Machine, and then click on the Network link the Navigation pane. Enter the VBOXSVR folder, and there you’ll find the same folder that you selected in Step 6.
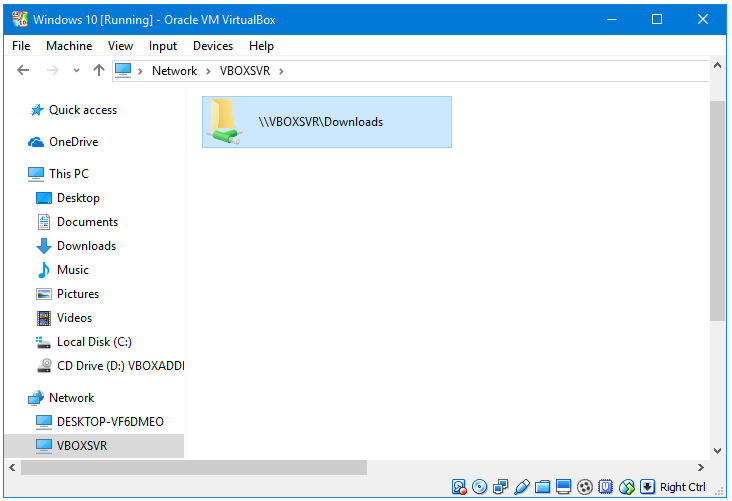
Step 11: As you can see, on the left side, we have the Downloads folder on the Host Machine, and on the right side, we have the same folder in the Guest Machine.
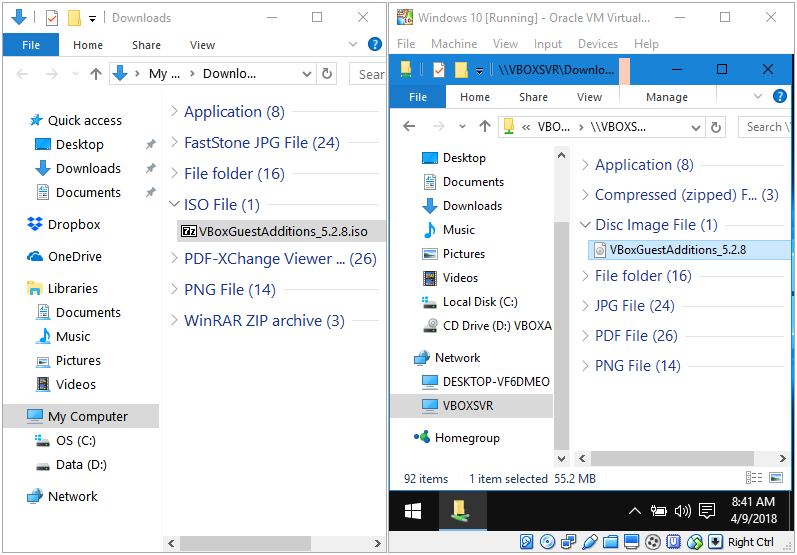
We have enabled the Shared Folders feature in VirtualBox.