Enable or Disable System Restore in Windows
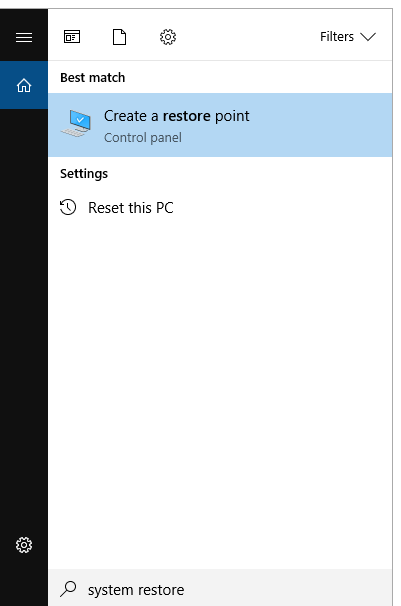
Step 1: Type system restore in Windows Search to open the System Protection feature of Windows.
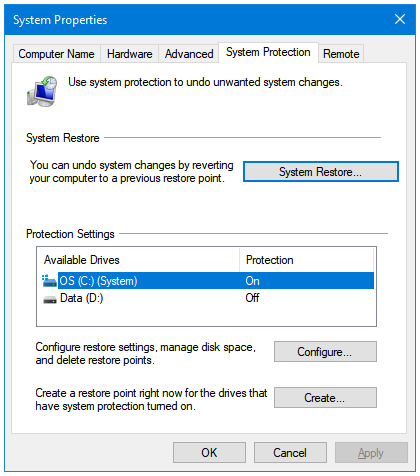
Step 2: Under the Protection Settings area, click on the name of the drive for which you want to enable or disable System Restore. Click on the Configure button to start the System Restore configuration process.
Step 3: In the following window, you will see three options – Restore Settings, Disk Space Usage, and Delete. Under Restore Settings, there are the following two options:
- Turn on system protection
- Disable system protection
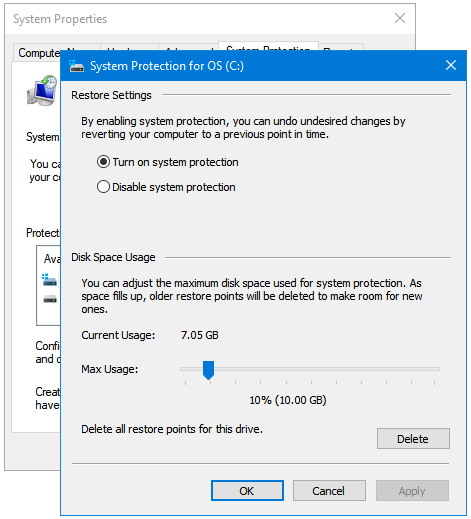
Here, you can click on either of the options to enable or disable the System Restore feature for the selected drive in Windows.
Step 4: Click Apply and then OK to implement the changes.
Step 5: Click Apply and OK again to close system restore.
Don’t forget to create one Restore Point before disabling and after enabling the System Restore feature.