In order to turn the Low Battery Notification On or Off in Windows, we first need to reach the Power Options, and then edit the Low battery notification settings.
Opening Power Options in Windows
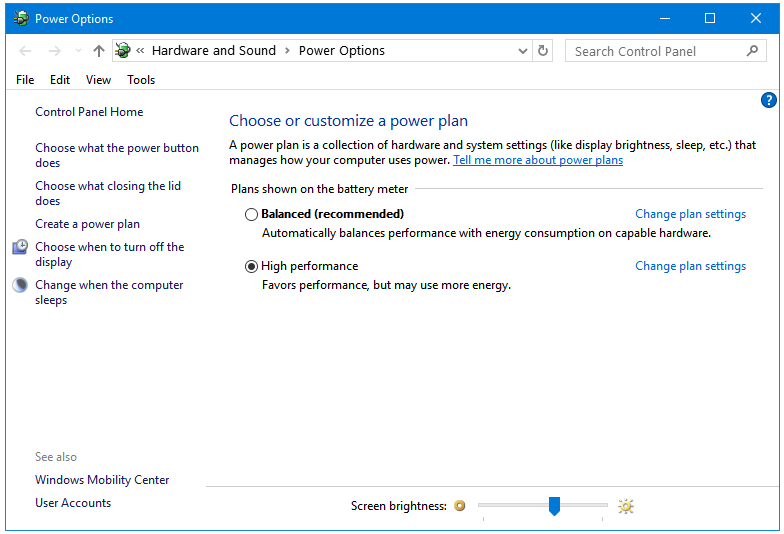
Step 1: Right-click on the Battery icon in the Taskbar, and then click on Power Options. It will open the Power Options window.

Step 2: In the Power Options window, click on the Change plan settings option of the power plan that you are currently using. In this case, the High performance power plan is being used.
Step 3: Next, in the Edit Plan Settings window, click on the Change advanced power settings link. This opens the Power Options.

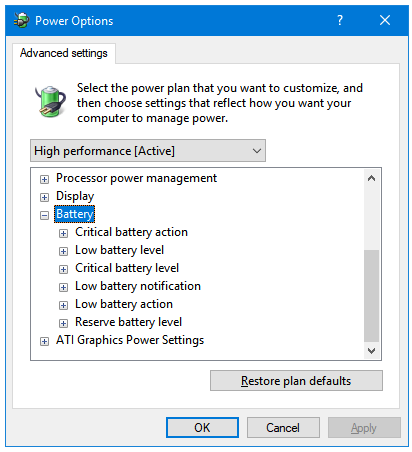
Step 4: In the Power Options window, go to the Battery option, and expand it.
Turn Low Battery Notification On or Off in Windows
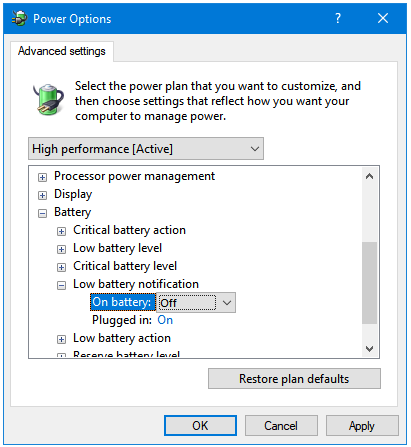
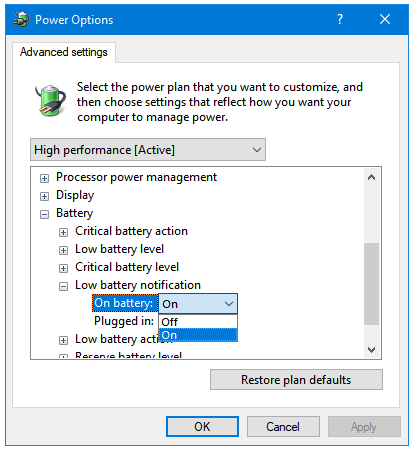
Step 1: Now, navigate to the Low battery notification option, and click on the (+) button next to it to display all of its options.
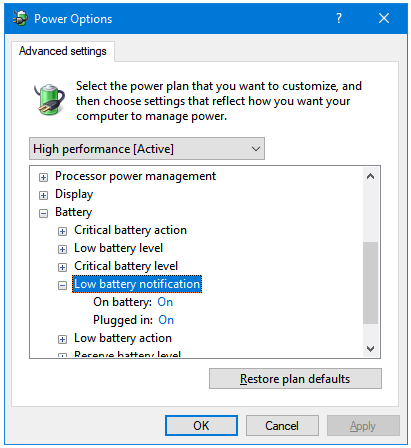
Step 2: By default, the Low battery notification is set to On; you can change it here to Off. Click on the On text, and then select the Off option from the drop-down menu to disable the Low battery notification for your computer. Similarly, you can change the setting from Off to On.
Step 3: After selecting the preferred option, click on Apply and then OK to complete the process.