The Hibernate Mode
The Hibernate mode in Windows is a mix of Shutdown and Sleep modes. When you press the Hibernate button in Power options button in Windows Start Menu, all of the contents of the RAM are moved to the Hard Drive, and stored into a file called hiberfil.sys. This means that Windows saves all of the data currently active on your system in the hiberfil.sys, and then shuts down your system. When you (re)start your system, Windows recovers your previous session from the hibernation file hiberfil.sys, and turns it into an active session.
Hibernate is Shutdown but with saved contents just like in Sleep mode. During booting, the system will detect that it was hibernated the last time, and will restore the contents of the previous session from the hiberfil.sys at the start of the system.
In order to make use of the Hibernate feature, by default Windows reserves 75% of the total amount of RAM installed on the computer for the hibernation file called hiberfil.sys.
How to Disable or Enable Hibernation in Windows
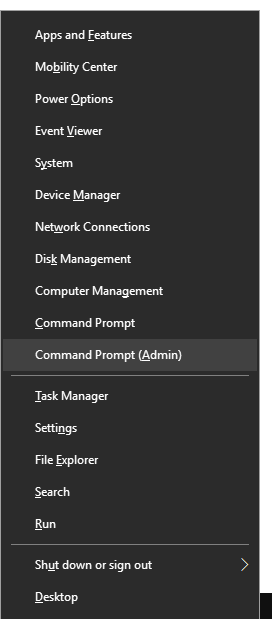
Step 1: Open the Windows Power User Menu by pressing Windows + X keys together.
Step 2: Click on the Command Prompt (Admin) item in the menu. This will open the Windows Command Prompt with Administrative privileges.
Step 3: If Hibernation is currently enabled, and you can want to disable it then type the following command in the Command Prompt window:
powercfg.exe /hibernate off
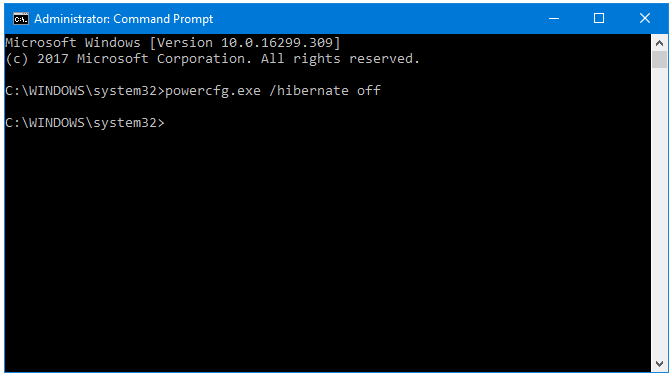
Press Enter.
Step 4: If Hibernation is currently disabled, and you can want to enable it then type the following command in the Command Prompt window:
powercfg.exe /hibernate on
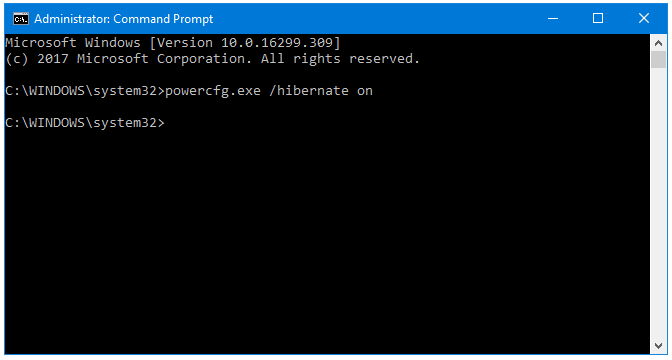
Press Enter.
Step 5: Close the Command Prompt window, and restart the computer to implement changes.