Disable Automatic Hardware Driver Updates in Windows 10
The Driver updates don’t come as often as other types of updates such as operating system feature updates, quality updates, security updates, or application software updates.
In case of Device drivers, the same version that came with your PC can be used for years. However, the same cannot about the system software and the application software, which are updated continuously for various reasons – be it the addition of new features, patching a vulnerability, or any other thing.
Even when a new version comes, some users may not want to upgrade to it. Because a new version does not always mean the addition of features, sometimes it also means the reduction of features. If you have set up your graphics, sound, and other drivers to work the way youth want them to, a major driver update can mean the loss of all those settings. The update can ignore all those configurations made by the user, and set the updated driver to its default settings. So, all of this forces the user to block the automatic driver updates.
How to Disable Automatic Hardware Driver Updates in Windows 10
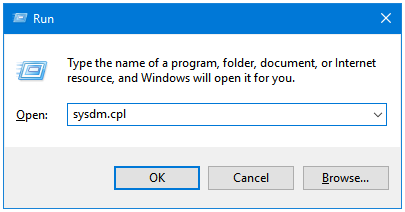
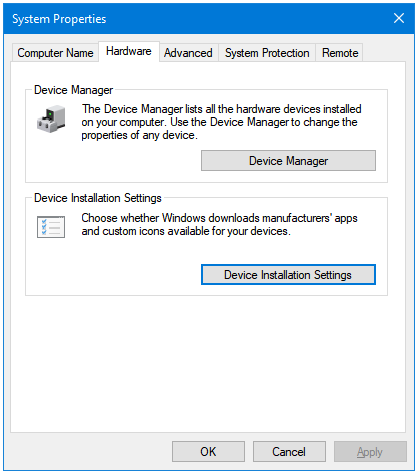
Step 1: Press Windows + R keys together to open the Run dialog box. Type sysdm.cpl in the text input field, and then press the OK button. This will open the System Properties window.
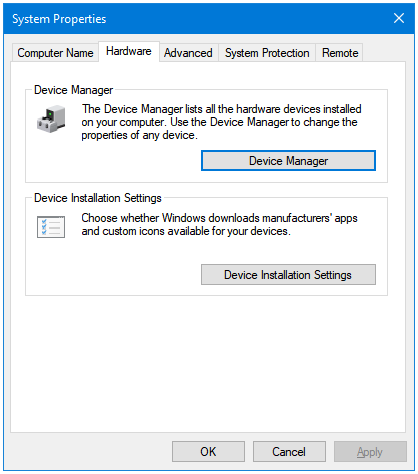
Step 2: In the System Properties window, click on the Hardware tab.
Step 3: Next, click on the Device Installation Settings button.
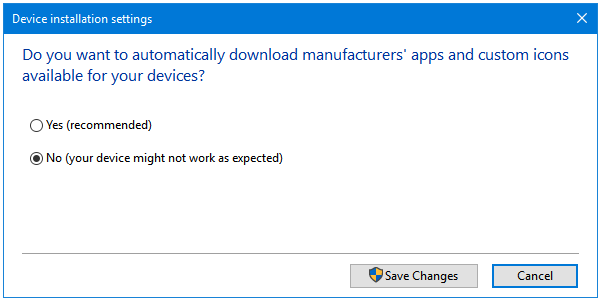
Step 4: The Device Installation Settings window lets the user enable or disable the option to automatically download the device manufacturers’ programs. It is set as Yes by default.
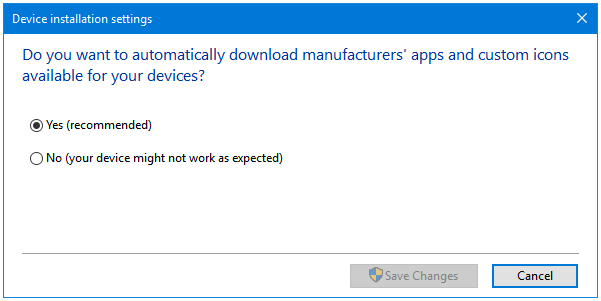
Step 5: Change the setting from Yes to No. Click the Save Changes button to apply changes.
Step 6: Click the OK button in the System Properties window to finish the process.
Reverse the process to re-enable the automatic driver updates.