Change the DNS Server Settings in Windows 10 PC
- What is Domain Name System (DNS)? How does DNS Work?
- How to Change the DNS Server Settings in Windows 10?
What is Domain Name System (DNS)? How does DNS Work?
DNS refers to Domain Name System. The Domain Name System is responsible for the translation of the numerical IP Addresses into human-readable Domain Names. For example, one of the IP Addresses of Google (https://www.google.com) is 74.125.24.99. You can see that remembering and typing a domain name, google dot com, is much easier and quicker than using an IP Address, 74.125.24.99.
A Domain Name System (DNS) uses two components to achieve Domain Name Resolution – a DNS Table and a DNS Server.
Whenever a user enters the name of a website in the URL bar of the browser, the DNS Servers look for that domain name on the DNS Table, converts the domain name into its IP address, and open the website with that IP address in the web browser.
DNS Server: A DNS Server does the job of translation or resolution of the human-readable website address i.e., domain name into the IP address of that website. They match the domain names with their corresponding IP addresses. The Internet Service Providers (ISP) provide DNS servers to their customers. However, users can change the DNS servers according to their will and based on the performance of other DNS servers.
Many companies provide public DNS servers; one such company is Cloudflare. The addresses of primary and secondary DNS servers provided by Cloudflare are 1.1.1.1 and 1.0.0.1. Two DNS server addresses are provided for the purpose of safety; if the Preferred DNS Server fails, the device will use the Alternate DNS Server for domain name resolution.
DNS Table: A DNS Table consists of a list of domain names and their corresponding IP addresses.
How to Change the DNS Server Settings in Windows 10?
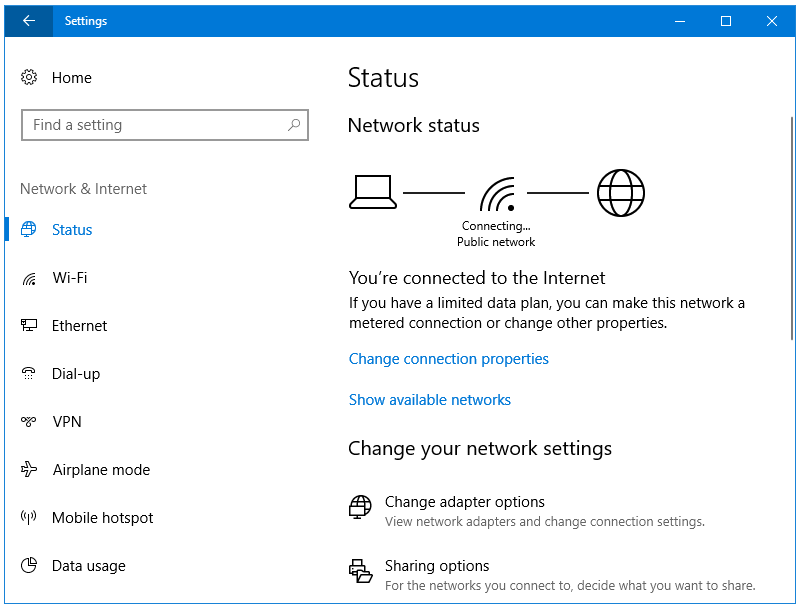
Step 1: Right-click on the Network icon in your Taskbar to open the Windows Settings app.

Step 2: Click on the Change adapter options link. It will open the Network Connections window.
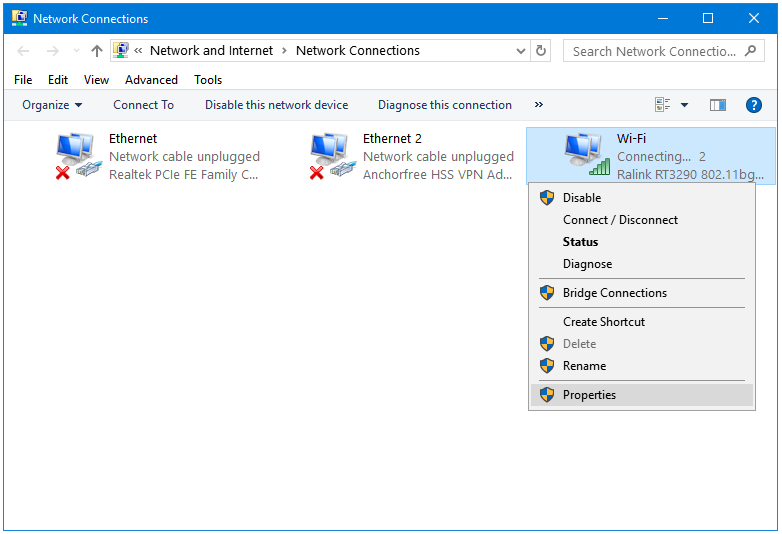
Step 3: Here, right-click on your network name, and then click on the Properties option from the context menu.
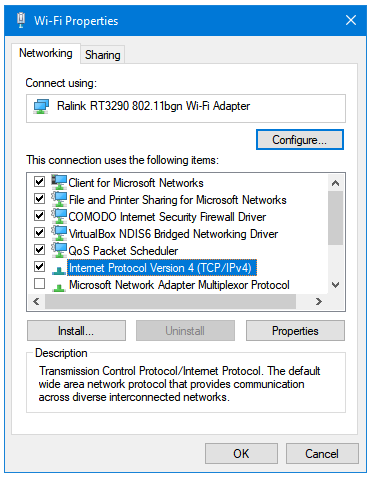
Step 4: Now, in the Network Properties window, go to Internet Protocol Version 4 (TCP/IPv4), and then click on the Properties button. This will open the Internet Protocol Version 4 (TCP/IPv4) Properties window.
Step 5: Go to the Use the following DNS server addresses: option. Enter the Cloudflare DNS settings.
- Preferred DNS server: 1.1.1.1
- Alternate DNS server: 1.0.0.1
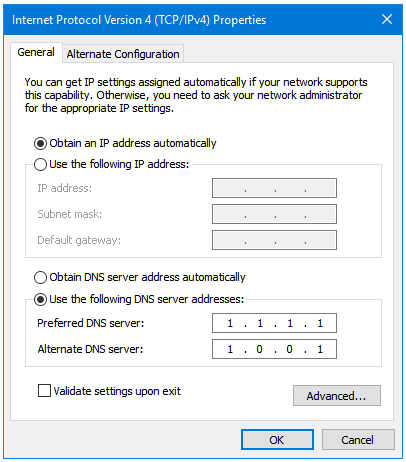
Step 6: Tick the Validate settings upon exit checkbox. Click OK to apply the changes.

Step 7: Restart your web browser to start using the new DNS service.
https://www.thepcinsider.com/10-benefits-using-third-party-dns-service/