Quick Access Toolbar
With the release of Windows 8, Microsoft replaced Windows 7 Explorer’s Toolbar with the Ribbon. The Ribbon made the access to many File Explorer features a lot quicker because of their integration into it, but at the same time, its huge size (for a toolbar) also made it use a large portion of the File Explorer. To make more space and viewing area for the items in the folders, users tend to minimize the ribbon. But, doing so removes the advantages of the Ribbon.
The good news is that the Toolbar isn’t completely gone; it still lives in the form of Quick Access Toolbar (QAT), and resides in the left-end of the Windows File Explorer Title Bar. The default settings of QAT are not very helpful; most users don’t even notice that it’s there. Here’s how you can customize the Quick Access Toolbar to make it more accessible and useful.
How to Customize the Quick Access Toolbar in Windows 10 File Explorer
Change the Position of the Quick Access Toolbar
Add or Remove Tools to the Quick Access Toolbar
Reset the Quick Access Toolbar to its Default Settings
Change the Position of the Quick Access Toolbar
By default, the Quick Access Toolbar is placed inside the Title Bar of Windows File Explorer.

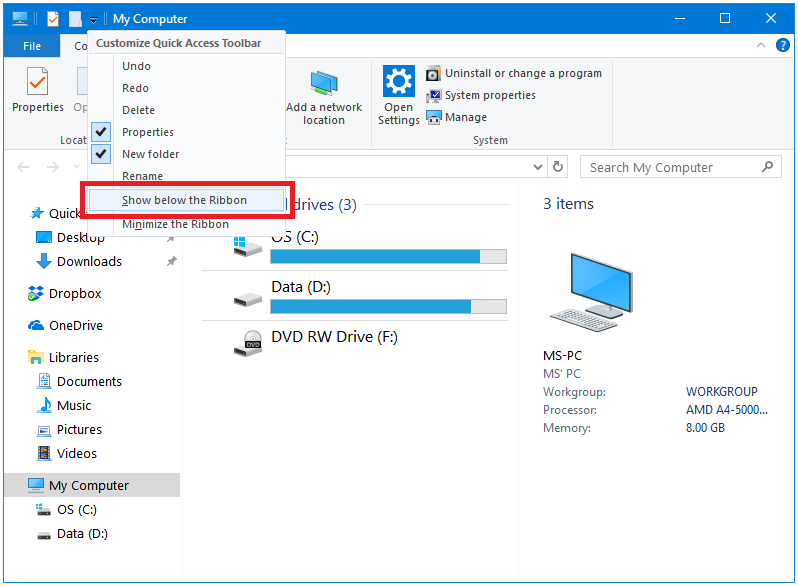
Show Quick Access Toolbar below the Ribbon
Right-click on the Quick Access Toolbar in Windows File Explorer Title Bar. In the Customize Quick Access Toolbar menu, click on Show below the Ribbon. Now the Quick Access Toolbar will have its own Toolbar.
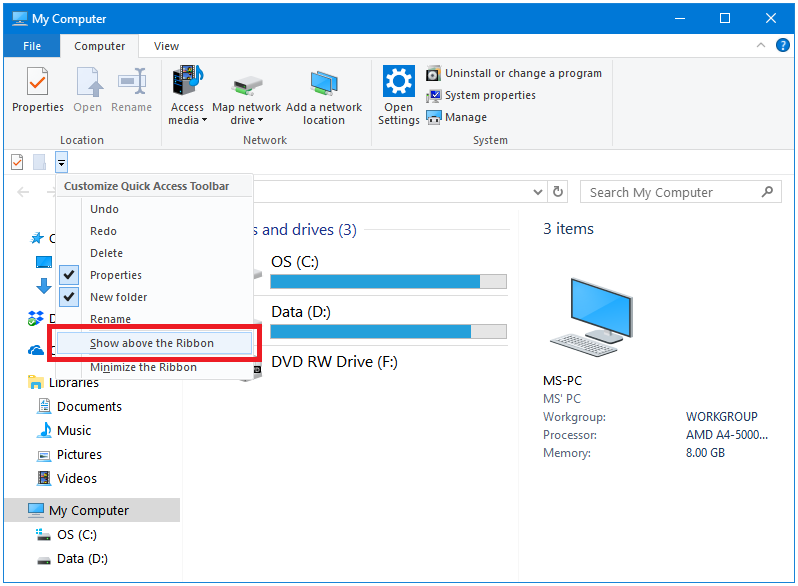
Show Quick Access Toolbar above the Ribbon
Click on the downward chevron button in the Quick Access Toolbar. It will open the Customize Quick Access Toolbar menu, click on the Show above the Ribbon option from this menu. Now, the Quick Access Toolbar has gone back to its default position.
Add or Remove Tools to the Quick Access Toolbar
The Quick Access Toolbar comes with only a couple of items by default. Because its minimal outlook, it remains unnoticed by most of the users.
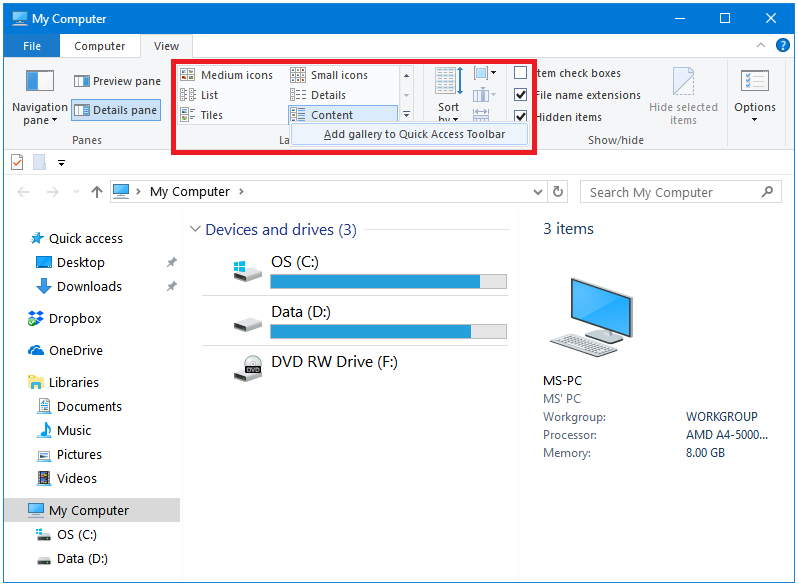
Add Tools to Quick Access Toolbar
Adding items or tools into Quick Access Toolbar is also very easy. Right-click on any item in the Ribbon, and then click on the Add gallery to Quick Access Toolbar button. Now, this whole gallery will be displayed as an icon in your Quick Access Toolbar.
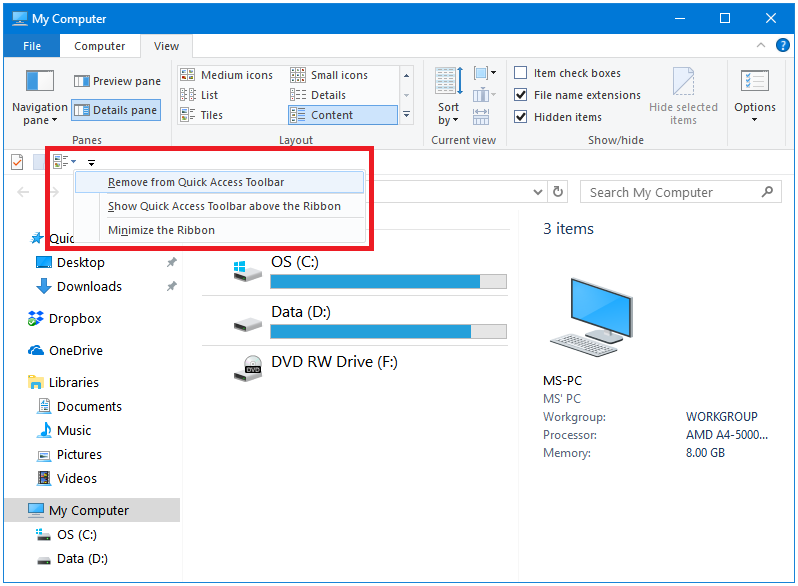
Remove Tools from Quick Access Toolbar
You can easily remove the tools Quick Access Toolbar. Right-click on any icon on the Toolbar, and then click on the Remove from Quick Access Toolbar button.
Reset the Quick Access Toolbar to its Default
Follow these steps to reset the Quick Access Toolbar to its default settings.
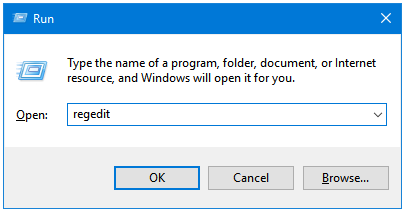
Step 1: Press Windows + R keys together to open the Run dialog box. Type regedit in the text field, and then click OK to open Registry Editor.
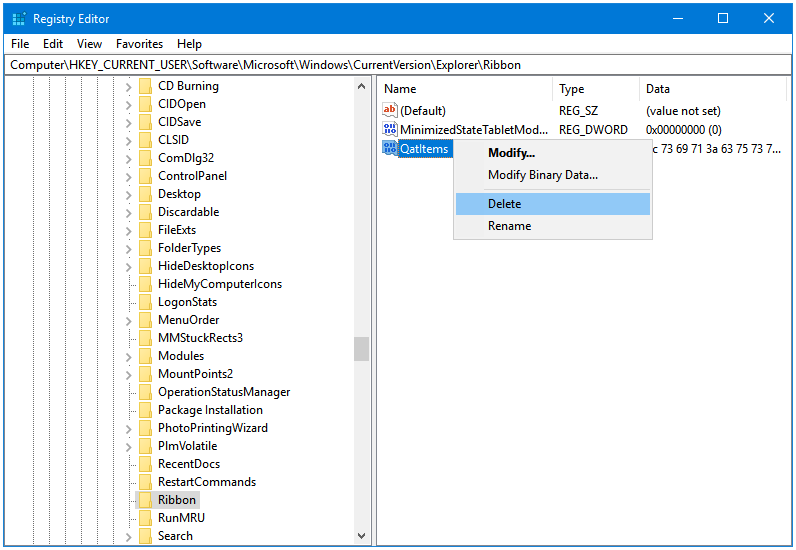
Step 2: Go to the following Registry Key.
HKEY_CURRENT_USER\Software\Microsoft\Windows\CurrentVersion\Explorer\Ribbon
Step 3: Right-click on the QatItems Registry String, and then click Delete.
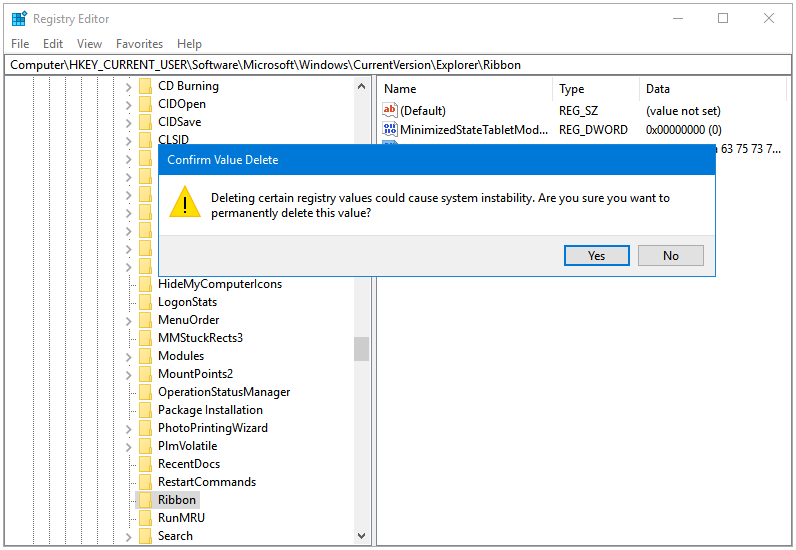
Step 4: Click Yes to confirm the deletion of the selected Registry String.
Now, the Quick Access Toolbar has gone back to its defaults.
Configure Quick Access Toolbar to improve your Productivity.