Windows Backup and Restore
Backup means keeping a copy of your data on a separate partition of the same drive or on a separate removable storage medium. This Backup can be used to Restore the data if you ever lose your original copy of data because of a virus attack, hardware malfunction, or any other reason.
Windows has an inbuilt function of backup and restore called Windows Backup and Restore. By default, Windows will backup only the Libraries folders, default Windows folders, Desktop contents, Drivers, and Registry settings. But, users can customize the backup process to include other files and folders as well. It allows the users to restore individual files and folders.
Another type of backup provided by Windows is called a System Image. A System Image is a copy of the the Windows partition. A system image can be used to restore your computer to the time when that image was created. It backups and restores all of the contents of the drive. You cannot select individual files to backup or restore.
The difference between Windows Backup and System Image is that Windows Backup allows selective restoration whereas System Image is a complete restoration. Windows Backup automatically includes the System Image in your Full Backup.
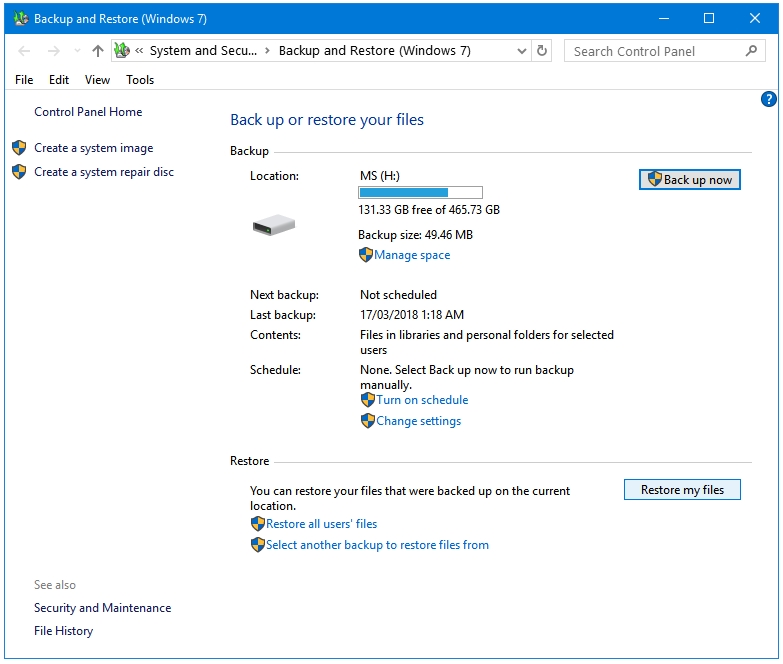
There are three options on the Windows Backup and Restore main window that you can use to customize your backups.
- Manage space: Clicking on the Manage space link opens the Manage Windows Backup disk space window, which gives you information about Backup location, Space usage summary, Data file backup, and System image.
- Turn on schedule: If you want to perform the same backup routinely then you can enable that by clicking on the Turn on schedule link in the Backup and Restore main window.
- Change settings: If you want to customize the backup files and folders then you can click on the Change settings to open the wizard that lets you do that.
Quick Links:
- Opening Windows Backup and Restore
- How to Backup your Data
- How to Restore your Data from previously created Backup
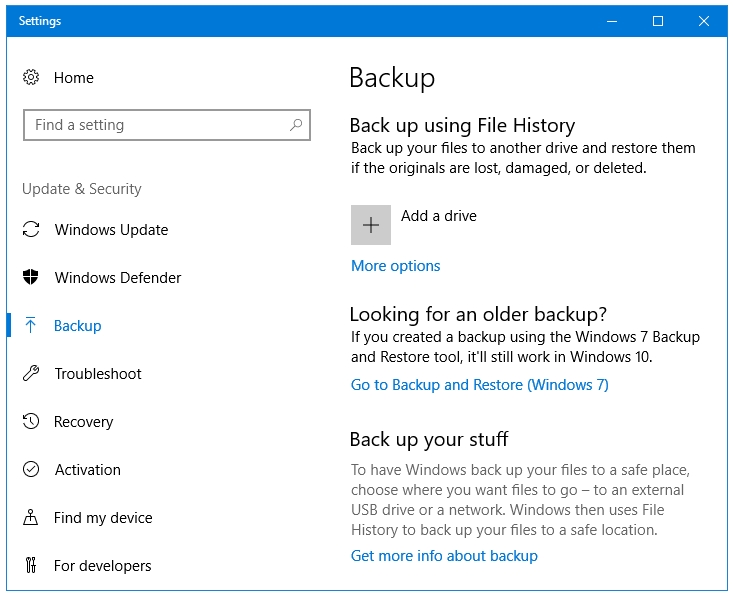
Opening Windows Backup and Restore
Step 1: Type backup in Windows Search to open Backup settings.

Step 2: In the Backup app, click on Go to Backup and Restore (Windows 7) link.
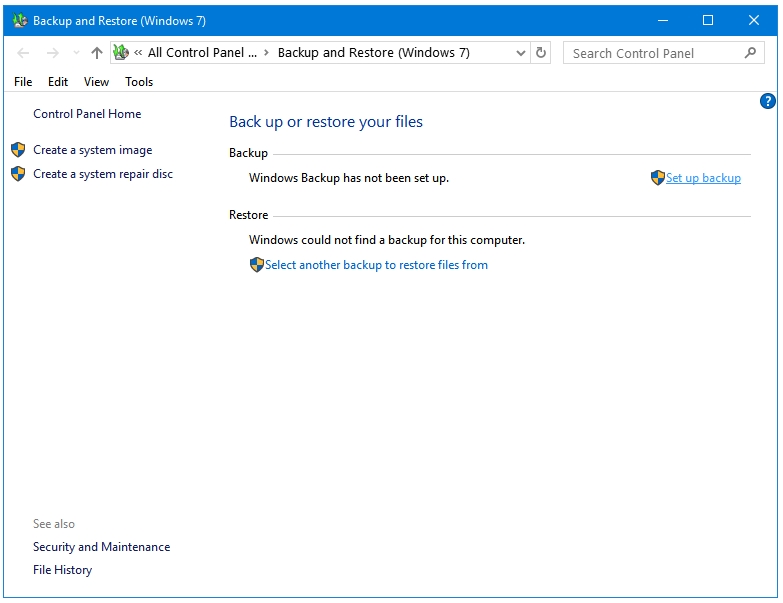
How to Backup your Data
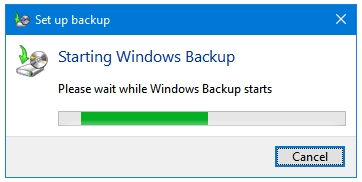
Step 1: In the Backup and Restore (Windows 7) window, click on the Set up backup link. This will start the Set up backup wizard.
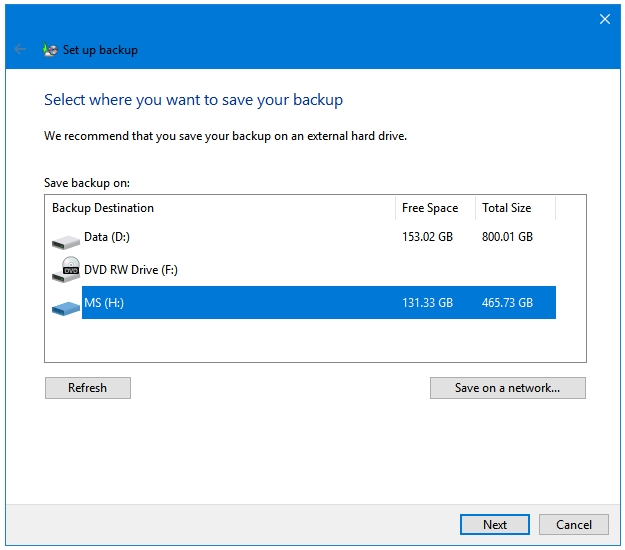
Step 2: The Set up backup wizard starts looking for the possible destination locations for your backup.
Step 3: After scanning for the connected devices, Windows populates them in front of you. You can select the location for your backup. The backup can be stored on at least 4 locations – Another partition on the same drive, CD/DVD, Removable storage devices, and Network. Select the one you want to use, and then click Next.
Step 4: Windows gives you two ways to select the files to be included in the backup. The first option called Let Windows choose (recommended) is selected by default. The user cannot choose the files and folders to backup in this option. Click Next to proceed further.
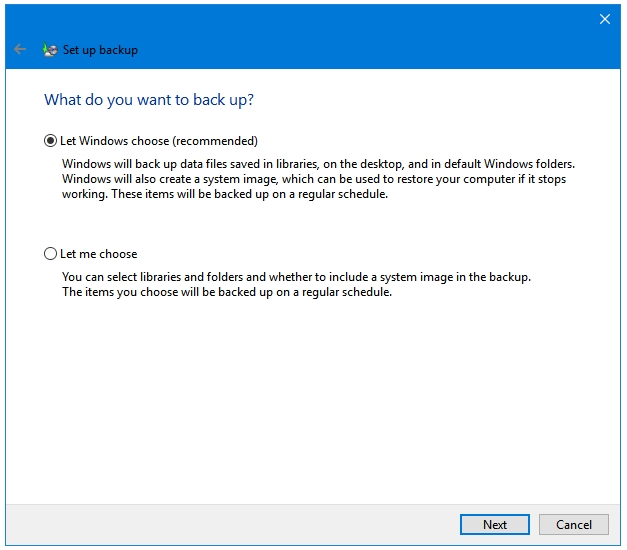
Step 5: Here you see the items that were selected by Windows for backup. The System image is also included. Click Save settings and exit button to close the window.

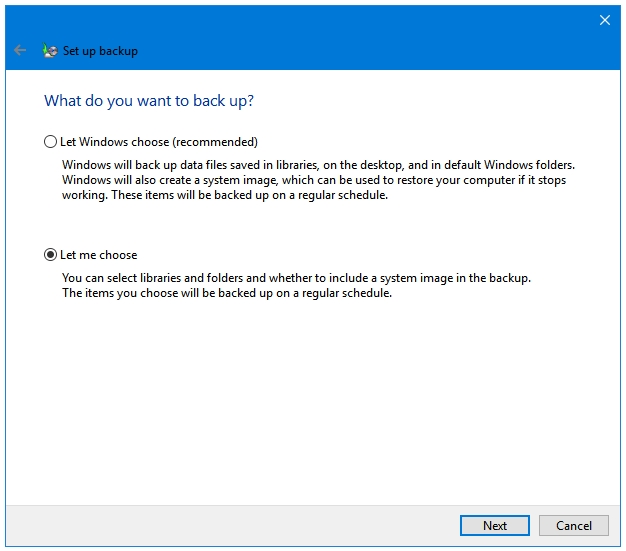
Step 6: The second option is Let me choose, which lets the user select files and folders that he wants to be included in the backup. Click Next to select files and folders.
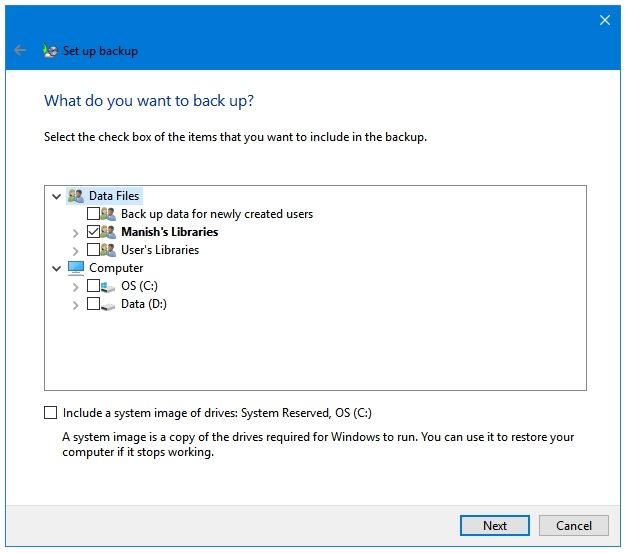
Step 7: As you can see, this option lets you customize your backup. You can include all of your partitions for backup. This mode also gives you the option to enable or disable the inclusion of System image in the backup. Click Next when you are ready.
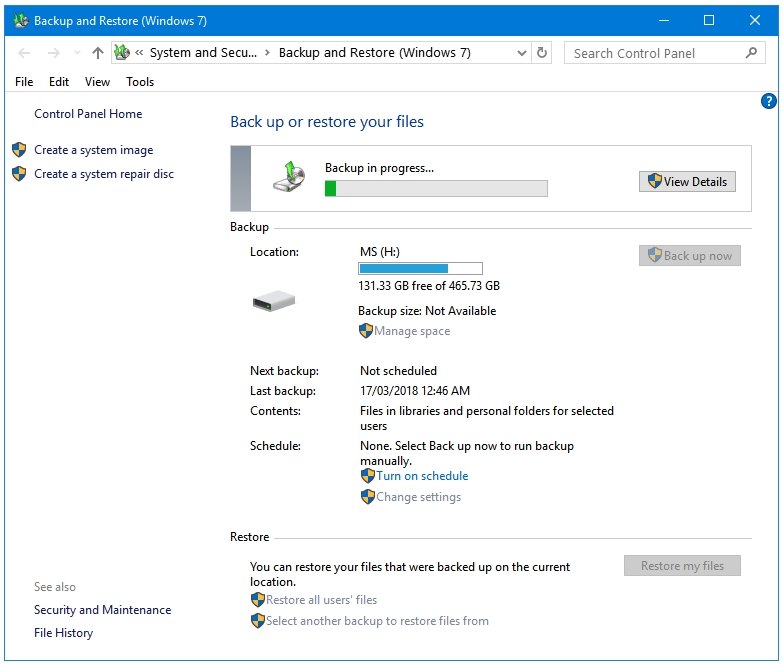
Step 8: Now, click the Back up now button in the main Backup and Restore window to start your backup. You can click the View Details button to see the backup process in detail.
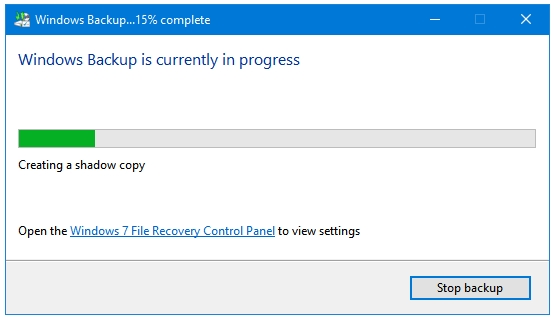
Step 9: Windows Backup is working.
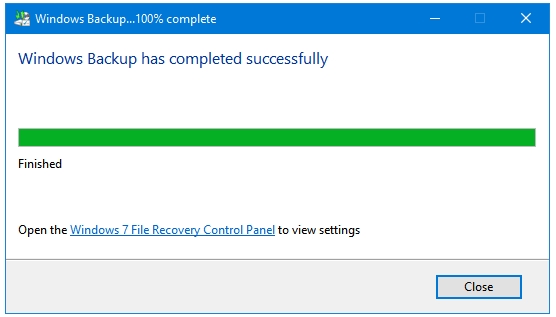
Step 10: Backup process has completed. Click the Close button to close the window.
How to Restore your Data from previously created Backup
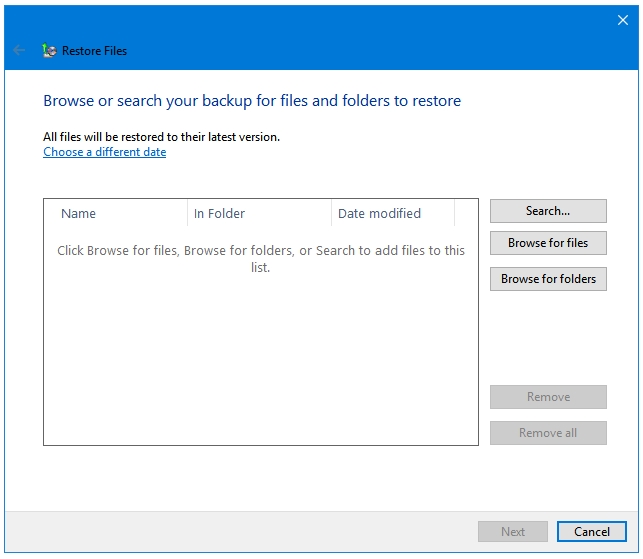
Step 1: Click on the button that says Restore my files.
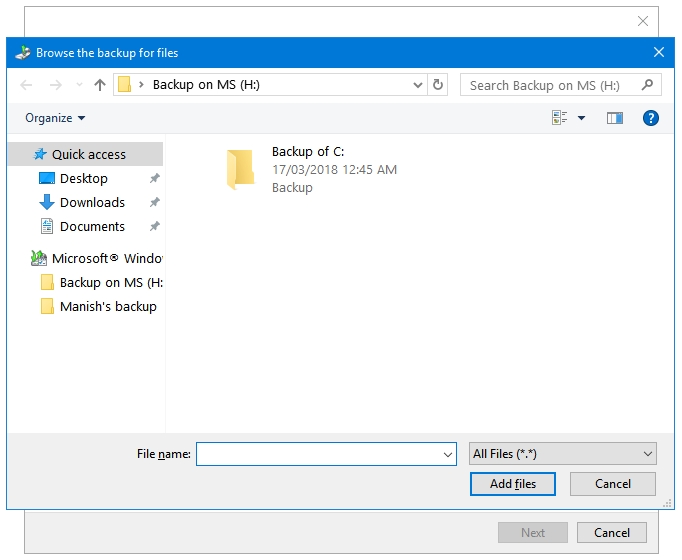
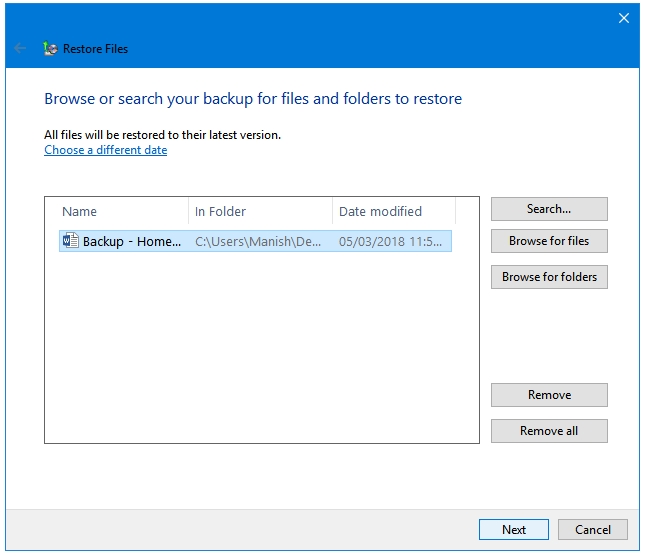
Step 2: Now, in the Restore Files window, browse for the files and folders that you want to restore by clicking on the Browse for files and Browse for folders buttons respectively.
Step 3: Add files and folders.
Step 4: Click Next to select the destination location.
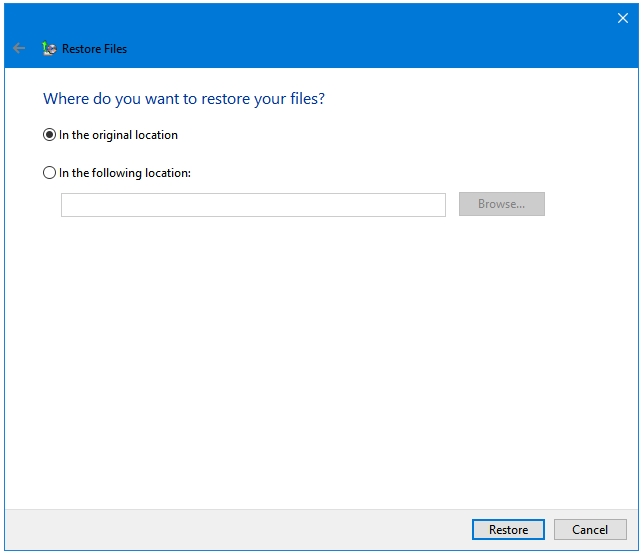
Step 5: You can restore your files to the original location of the files or on a custom location. Click the Restore button to start the restoration process.
Step 6: Once the restoration process has completed, you’ll see the Your files have been restored message. Click Finish to close the Restore Files wizard.

Making routine Backups is the best computer practice. Don’t be a victim of cyber-attacks or faulty hardware; always keep a backup of your Data.
knowlageable