How to Edit the Windows Registry
The Windows Registry is a very powerful tool. In the process for configuring and customising your Windows PC, you may need to edit your Windows Registry. You may need to create a new key, modify the existing keys, or you may also have to delete the specific keys or subkeys.
- How to Modify a Registry Key in Windows
- How to Create a new Registry Key in Windows
- How to Delete a Registry Key in Windows
1. How to Modify a Registry Key in Windows
Step 1: Backup your Registry before making any changes.
Step 2: Press Windows + R keys together to open the Run dialog box.
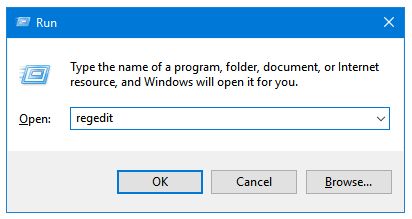
Step 3: Type regedit in the text field, and press OK. This will open the Registry Editor.
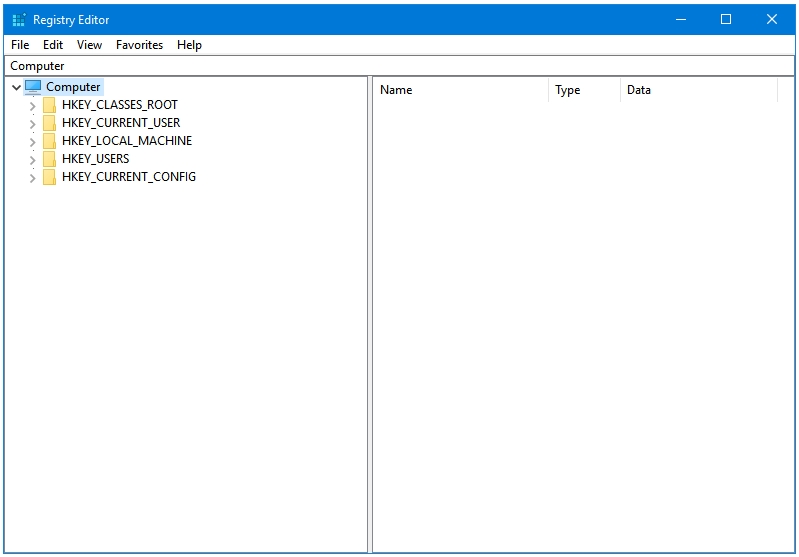
Step 4: Navigate to the Registry key or value that you want to modify. For example, we’ll be editing the following subkey:
Computer\HKEY_CURRENT_USER\Control Panel\Desktop
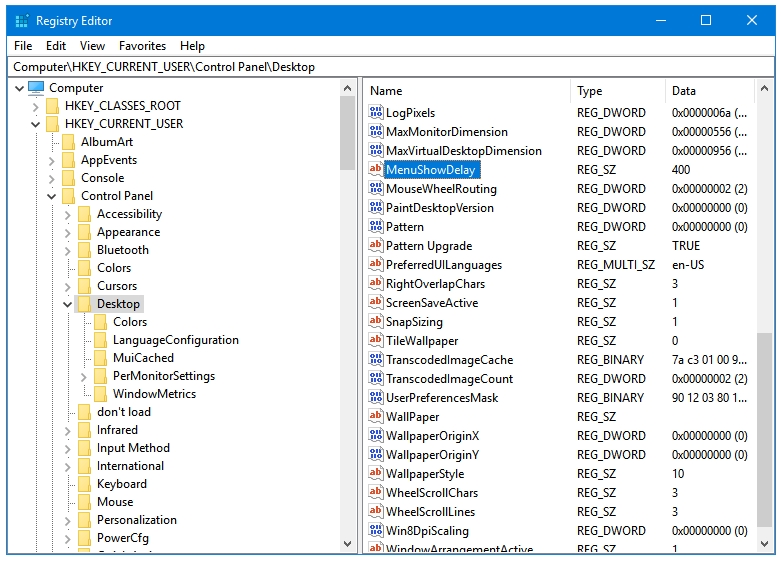
In this subkey, find the value titled MenuShowDelay whose default value is 400. MenuShowDelay stores the taken by the Windows to open Windows Menus. So the number 400 here is the time in milliseconds taken by Windows to open its Menus. Let’s modify it to 100 to make Windows open Menus faster.
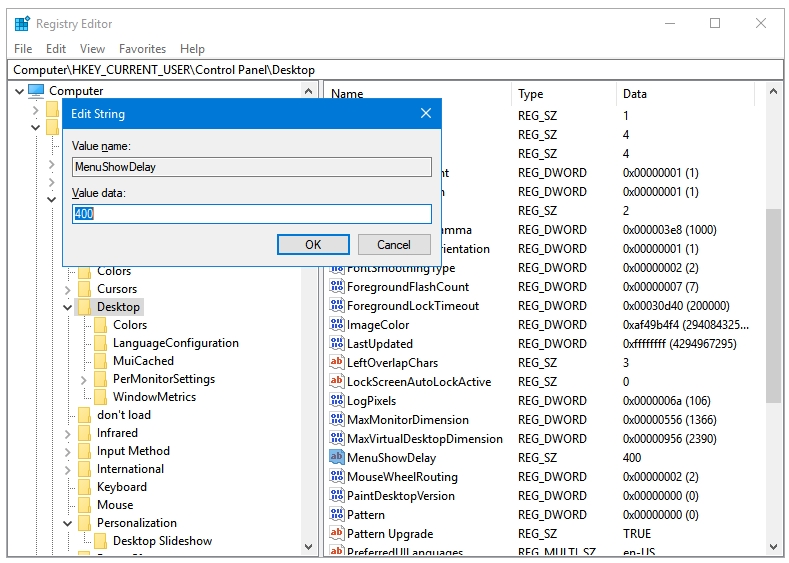
Step 5: There are two ways to edit it – Double-clicking it, or Right-clicking it. Open it by using any of the two ways.
Step 6: As you can see, it has two fields – Value name, and Value data. Enter 100 in Value data. Click OK. That’s it.
2. How to Create a new Registry Key in Windows
We’ll create a Registry value that will disable the Windows Logon Background Image.
Step 1: Backup your Registry before making any changes.
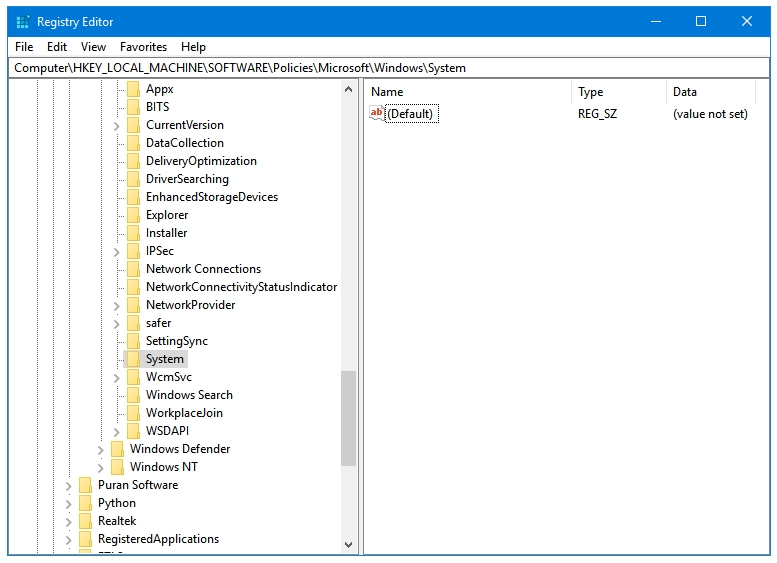
Step 2: In the Registry Editor window, go to the following key:
Computer\HKEY_LOCAL_MACHINE\SOFTWARE\Policies\Microsoft\Windows\System
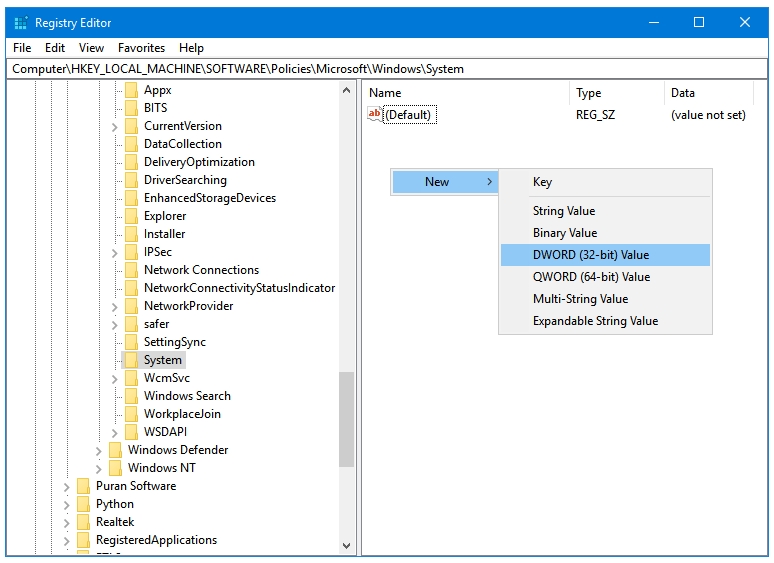
Step 3: Right-click on the right pane of Registry Editor. Click on New, and then select DWORD (32-bit) Value option.
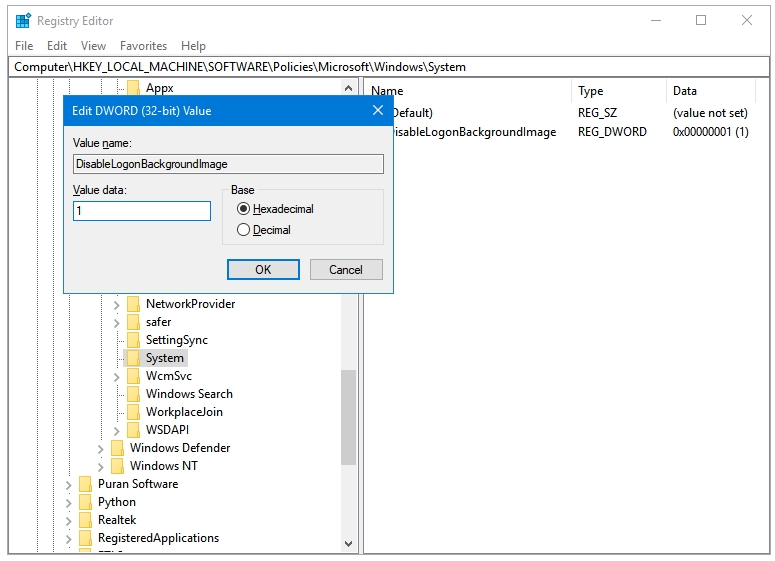
Step 4: Rename the newly created value from New Value #1 to DisableLogonBackgroundImage.
Step 5: Now, double-click this value. You can see that the default value in the Value data field is 0; change the value from 0 to 1. 1 enables this value, and 0 disables it.
Step 6: Restart your computer to complete the process.
3. How to Delete a Registry Key in Windows
Step 1: Backup your Registry before making any changes.
Step 2: In the Registry Editor window, go to the following key:
Step 3: Go to the entry that you want to delete. In this case, we’ll delete the key that we just created ourselves. So go to the following key:
Computer\HKEY_LOCAL_MACHINE\SOFTWARE\Policies\Microsoft\Windows\System
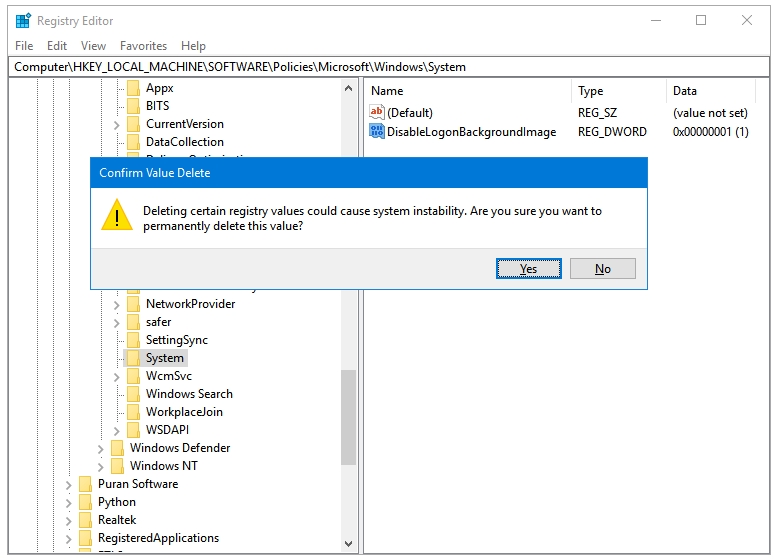
Step 4: Right-click on the DisableLogonBackgroundImage value. Click on the Delete option.

Step 5: Click Yes in the popup window if you agree with it.
Step 6: Restart your computer to complete the process.