Rescue Disk
A Rescue CD or USB boots with the computer bypassing Windows. It is mainly used when Windows is unable to start, which may be because of various reasons. Some of them are:
- It is infected with malware.
- The hard disk has bad sectors. Some of the Windows boot files are present on those sectors, and therefore cannot boot/start.
- Windows files are corrupt or missing, because of the previous two or some other reasons.
In these cases, a Boot CD/USB can prove to be a lifesaver. It can be helpful in a number of ways. Some of them are:
- Rescue disks can be used to clean an infected copy of Windows. To remove infections from Windows, Rescue disks provided by antivirus companies can be helpful. These disks let the user connect to the online antivirus database of that company, then scan and remove the infections from the computer.
- Rescue disks can be used to repair the corrupt Windows installation. Windows lets its users make a recovery drive. This recovery drive can be used to repair or reinstall a corrupt Windows.
- Rescue disks can be used to backup the data of the host computer to an external storage device. Any Linux distro based CD/USB disk can be used for this purpose.
Bitdefender is one of the best antivirus products for the Windows computers. It consistently occupies the first spot or ranks among the top three positions in most of the independent antivirus tests, reports and surveys.
Creating Bitdefender Rescue CD
Download the Bitdefender Rescue CD .iso file from the following official download link:
http://download.bitdefender.com/rescue_cd/latest/bitdefender-rescue-cd.iso
To create a Rescue CD (or USB), you need to burn the downloaded .iso (image) file on the CD (or USB). In order to burn the .iso to your USB drive (or pen drive or flash drive or thumb drive), you need an image burning software installed on your computer. The recommended software here is Rufus. Download and open Rufus.
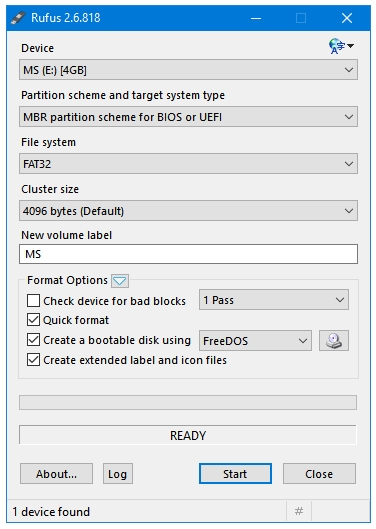
Select your USB drive in the Rufus Device menu.
Use MBR partition scheme for BIOS or UEFI. The USB made using this option can run on both types of systems – the older BIOS as well as the newer UEFI.
Keep FAT32 as the File System.
Use the Default Cluster size.
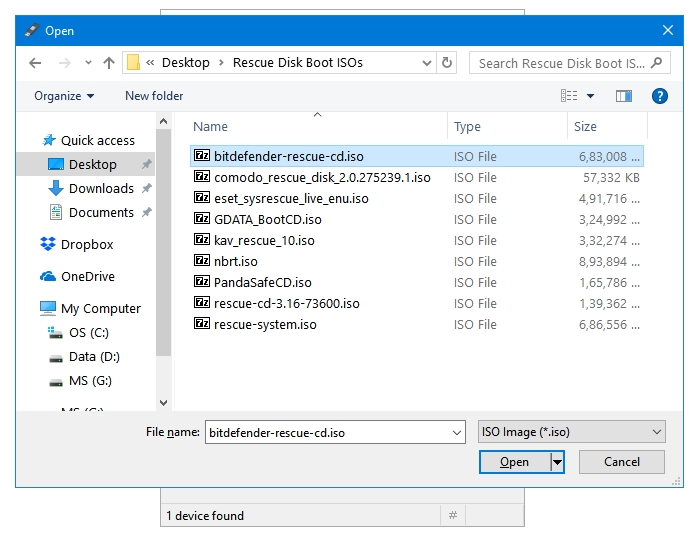
In the Format Options, click the button with the disk icon to browse the iso file that you want to burn on the USB drive. In this case, I’m selecting the Bitdefender Rescue CD iso file.
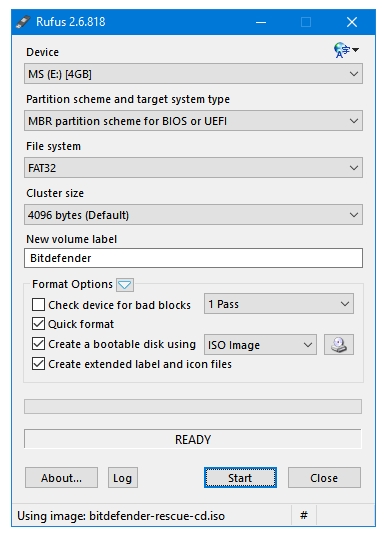
When the Bitdefender iso has been selected, you’ll notice that the New volume label has automatically changed.
Now’s the time to make sure that the USB you’re going to use is not having any files in it. Because the drive will be formatted at the beginning of the burning process, and all of your files inside the USB drive will be deleted. Also, make sure that you have selected the right USB drive. There may be more than one USB inserted into the system. In such a scenario, you could accidentally delete your files and burn the iso on the wrong drive.
Click the Start button at the bottom of the program window to start the burning process.
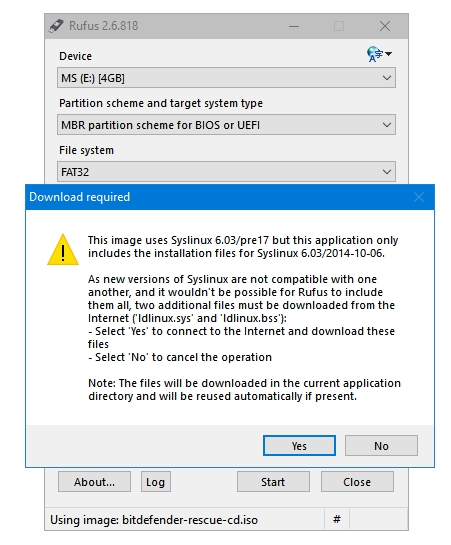
The program may ask you to download updates or some important required files. Click Yes to continue.
Again, select the Recommended option, and then click the OK button.

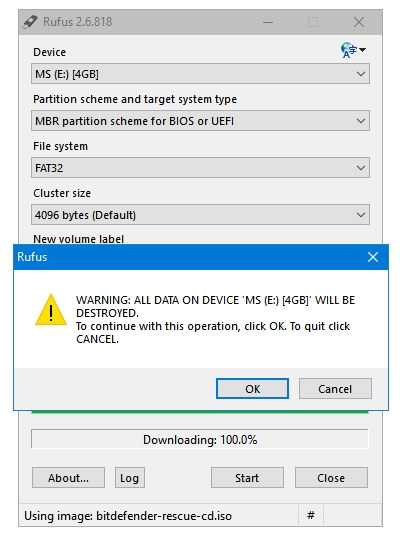
The program displays a final warning message before starting the burning process. Click OK when you’re sure.
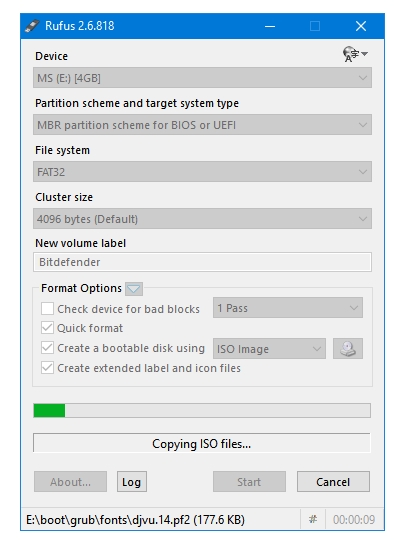
The process starts. It may take around 5 minutes to complete the burning process.
Once the process has finished, Rufus will display the READY text in its status bar. You can safely remove the USB drive and Close the program.
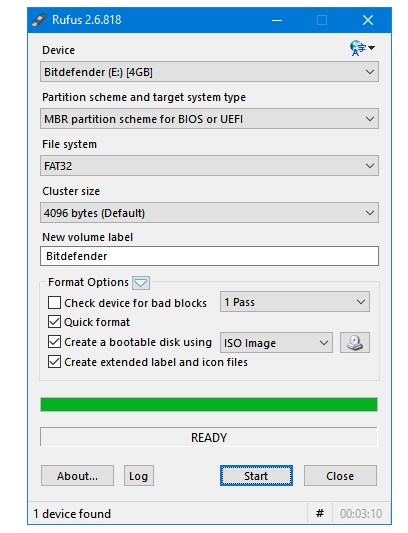
Now, you are ready with the Bitdefender Rescue USB.
Please spread the word that the hibernation has tol be turned off in or for Bitdefender and ESET bootales to work with Windows 10. Open command prompt —. Type the commad “pwrcfg /hibernate off”f —-.Then type “exit” and press enter. Restart system with rscue disk.