Windows has some great inbuilt tools that are either little known or not known at all. The most important thing here is having the knowledge that such tools exist in your Windows. You can access all of these by typing their name in Windows Start Menu Search or you can open them through Run dialog box.
- System Configuration (msconfig)
- Registry Editor (regedit
- Local Group Policy Editor (gpedit)
- System Restore
- Recovery Drive
- User Accounts
- Services
- Resource Monitor
- Disk Cleanup
- Defragment and Optimize Drives
- Disk Management
- Computer Management
- Microsoft Windows Malicious Software Removal Tool
- System Information
- GodMode
1. System Configuration
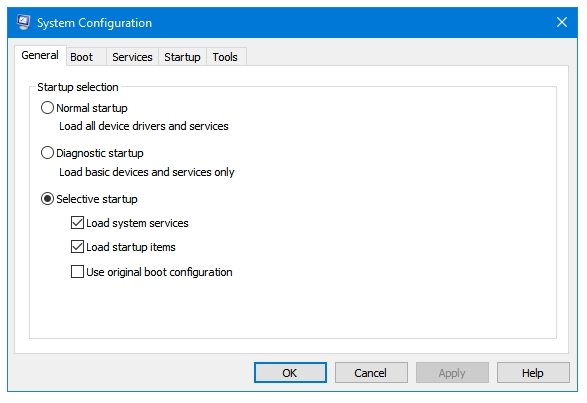
The Windows System Configuration tool opens the gates to the most number of windows tools to its users. System Configuration has five tabs for its options – General, Boot, Services, Startup, and Tools. The General tab lets you select the Windows Startup mode, which can be Normal, Diagnostic or Selective. The Boot tab provides you tools that can be used to tweak the Windows Boot process. The Services and Startup tabs display the Services and Programs respectively that start with Windows. The Tools tab has the shortcuts to various Windows utilities.
How to access: Open the Run dialog box by pressing Windows + R. Type msconfig in the text area, and press OK.
2. Registry Editor

The Windows Registry or Registry is a hierarchical database that contains information, settings, and options about all of the software and hardware installed on the Windows Operating System. It contains information about various users that are created for the system, and the programs and Windows preferences of those users. It also keeps the settings about how Windows behaves. The Registry Editor lets you create new keys, delete old keys, rename and modify the values of existing keys to tweak Windows.
How to access: Open the Run dialog box by pressing Windows + R. Type regedit in the text area, and press OK.
3. Local Group Policy Editor
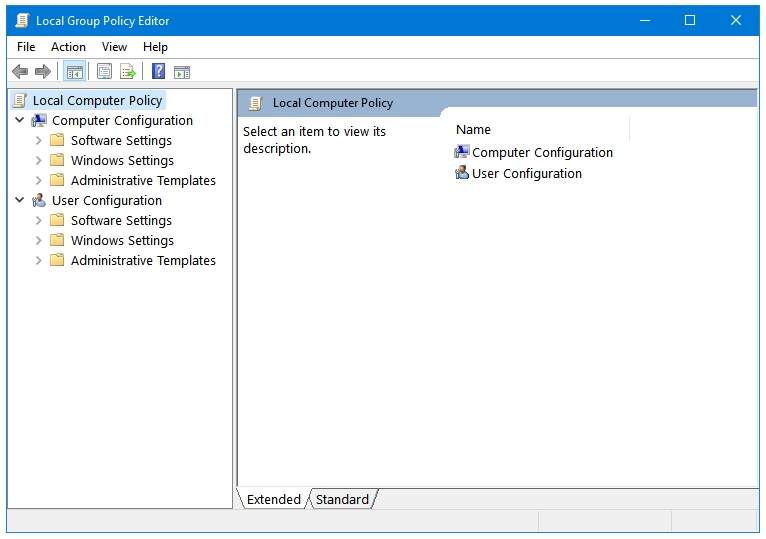
Mainly the system administrators use the Local Group Policy Editor. Therefore, it available only in the Pro (or Ultimate) editions of Windows, and not in the Home (Basic or Single Language) editions. All of its options can be used in home computers as well but they are not that relevant there. It is used by the System Administers to block employee or student access to Windows USB ports, Windows tweaking tools, User Accounts, System Configuration files, Windows System files, Windows Administrative Rights, and other high priority options. It is also used by Malware and Malware creators to block user access to emergency tools such as Shutdown, Power Options, Task Manager, Keyboard, Mouse, Touchpad, etc. But, this same tool can be used to recover from such malware attacks by reversing these settings. The Local Group Policy Editor gives the user access to many advanced options available in Windows.
How to access: Open the Run dialog box by pressing Windows + R. Type gpedit.msc in the text area, and press OK.
4. System Restore
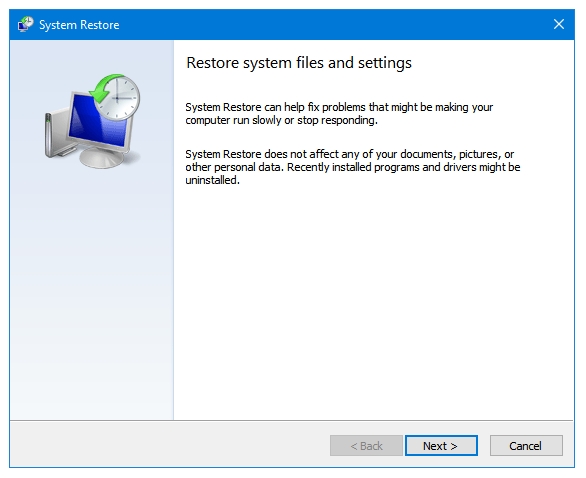
System Restore was first introduced in Windows ME. It allows the Operating System to revert to the point of Restore Point creation. A Restore Point is created automatically or manually. It is the first tool that users should try in recovering from Windows errors. It is recommended to create Restore Points before playing with Windows Registry, or Windows and Programs settings.
How to access: Open the Run dialog box by pressing Windows + R. Type rstrui.exe in the text area, and press OK.
5. Recovery Drive
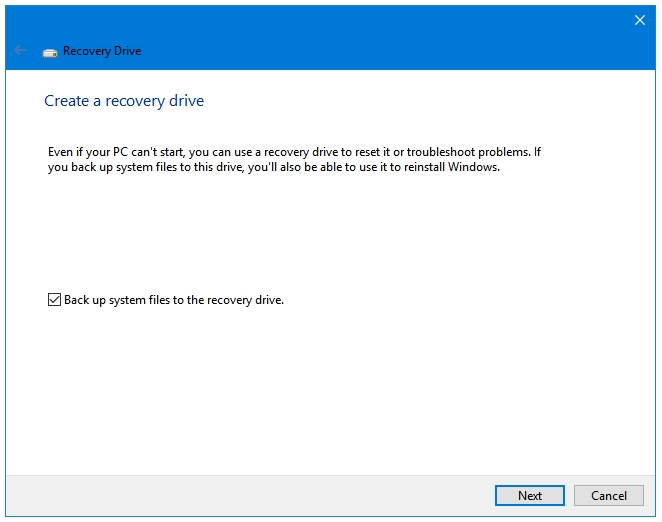
The creation of a Recovery Drive is the most important thing that you should do after installing Windows or performing major Windows Updates. A Recovery Drive is helpful in recovering from errors that make Windows unbootable. All of the Windows Recovery options can be accessed by booting the computer with the Recovery Drive.
How to access: Open the Run dialog box by pressing Windows + R. Type RecoveryDrive.exe in the text area, and press OK.
6. User Accounts
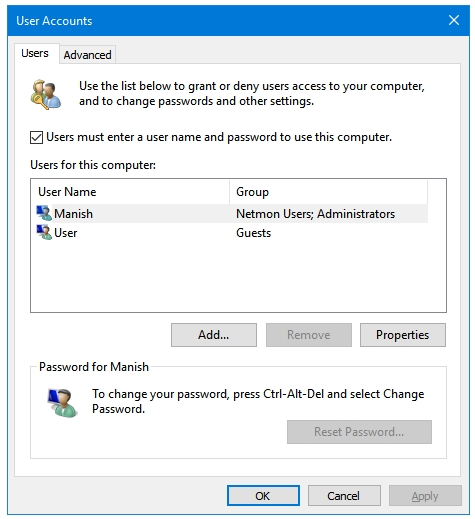
The User Accounts tool has some nifty settings about users and user profiles. The most important setting in this tool is the option to enable or disable the requirement to enter user names and passwords to log into the computer.
How to access: Open the Run dialog box by pressing Windows + R. Type Netplwiz.exe in the text area, and press OK.
7. Services
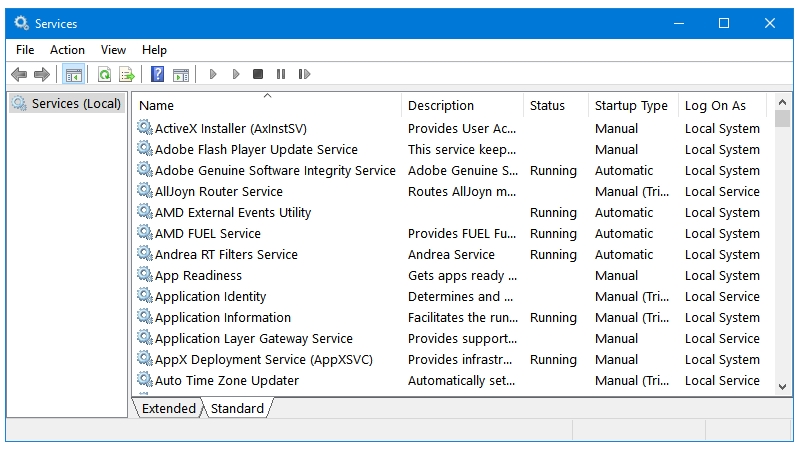
The Services tool lets you view and edit all of the services that Windows runs in the background. Make sure you create a Restore Point before playing with program services.
How to access: Open the Run dialog box by pressing Windows + R. Type services.msc in the text area, and press OK.
8. Resource Monitor
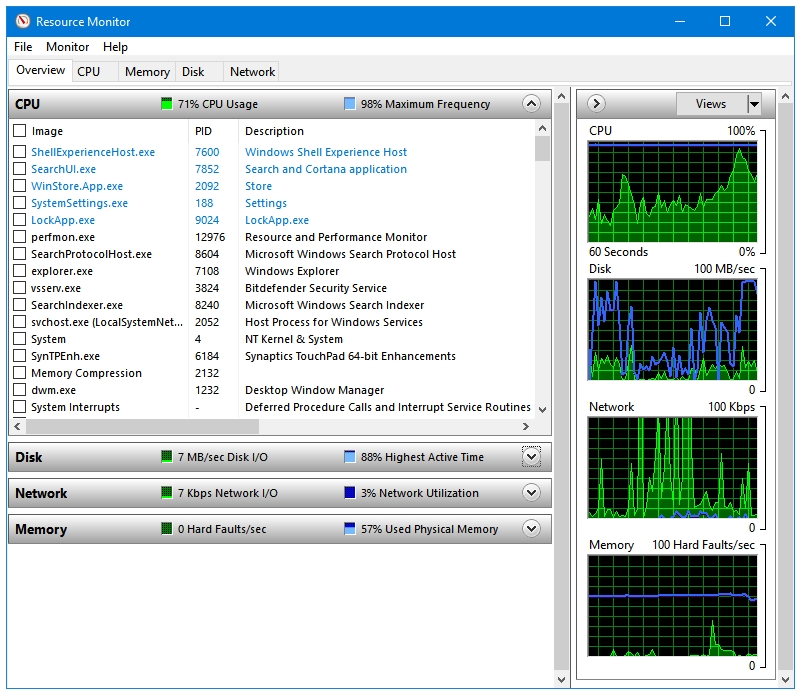
It presents data and details about Hardware, Network, running Processes, and their Resource usage. The Overview tab gives you the system overview in four sections – CPU, Disk, Network, and Memory. All four of these options have their dedicated tabs to display detailed information.
How to access: Open the Run dialog box by pressing Windows + R. Type resmon.exe in the text area, and press OK.
9. Disk Cleanup

It is Windows’ inbuilt Disk Cleaner tool. If you are worried about the security risks, disk impact, incompatibility and other issues regarding the use of third party disk cleaners then you are better off using the default Windows disk cleaner tool. It finds all kinds of junk files. You also get the option to remove Clean up System Files, which scans and removes Windows update and upgrade files as well.
How to access: Open the Run dialog box by pressing Windows + R. Type cleanmgr.exe in the text area, and press OK.
10. Defragment and Optimize Drives

It is Windows’ inbuilt Disk Defragmentation and Optimization tool. It displays all of the partitions in its main window. You get two options – Analyze, and Optimize. The Analyze option scans and analyses the partitions for fragmentation, and then displays it in percentage. The Optimize option defragments and optimises the partitions. By Default, it set to perform its operations Weekly, but you can choose from two other options as well, which are Daily and Monthly.
How to access: Open the Run dialog box by pressing Windows + R. Type dfrgui.exe in the text area, and press OK.
11. Disk Management
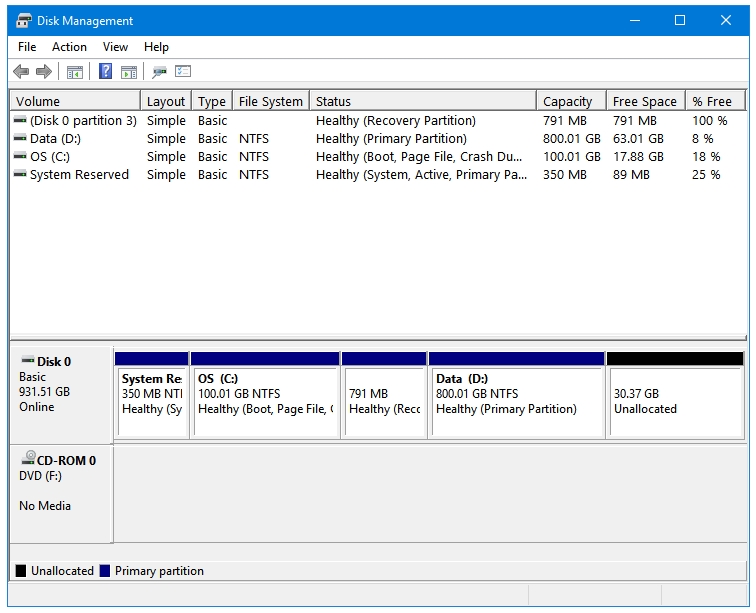
It is Windows’ inbuilt partition manager. Disk Management lets the user Create, Format, Extend, Shrink, and Delete partitions. Other than these, two additional operations that can be performed with this tool are Mark Partition as Active, and Change Drive Letter and Paths.
How to access: Open the Run dialog box by pressing Windows + R. Type diskmgmt.msc in the text area, and press OK.
12. Computer Management
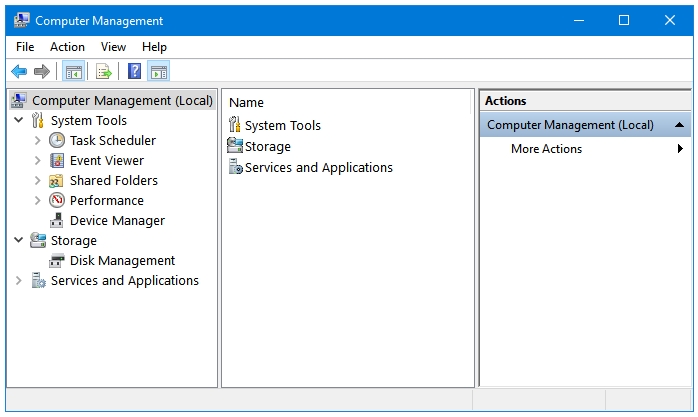
The Computer Management contains various system tools under one window.
Task Scheduler: The Task Scheduler allows users to create and manage custom scheduled tasks i.e., the tasks that you want performed automatically on specified times; you can also view currently running scheduled tasks.
Event Viewer: The Event Viewer displays all of the system events that have occurred on your computer, you can see detailed information about these events.
Shared Folders: If you share some folders over the network then they will be visible here in this place.
Performance: Performance or Performance Monitor collects the data about system performance, and keeps reports and logs of it.
Device Manager: The Device Manager is a major system tool that displays all of the hardware components installed and connected to your system. It allows you to Update, Disable, Enable, and Uninstall hardware components. It also displays warning messages for erroneous system components.
How to access: Open the Run dialog box by pressing Windows + R. Type CompMgmtLauncher.exe in the text area, and press OK.
13. Microsoft Windows Malicious Software Removal Tool

If you’ve ever looked into the Windows Update process, and the things that it downloads in its updates then you’d have noticed a small tool of about 10MB called the Microsoft Windows Malicious Software Removal Tool in the list of the files being installed in the update. Because it has the word Microsoft written in beginning of its name, Windows users don’t spend too much time thinking about its purpose considering it to be mediocre like other Microsoft application and utility software on Windows. But, it is actually a very useful tool like other great tools listed here. This tool scans Windows for malicious software or the Malware.
How to access: Open the Run dialog box by pressing Windows + R. Type mrt.exe in the text area, and press OK.
14. System Information
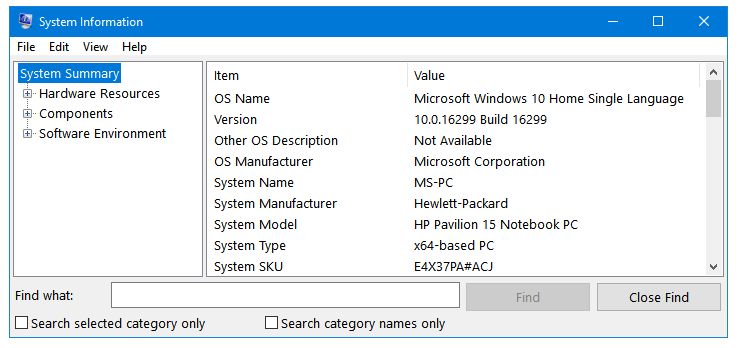
The System Information tool displays Windows System Summary in three categories – Hardware Resources, Components, and Software Environment. Clicking on each plus button expands it, and displays more links and detailed information about them.
How to access: Open the Run dialog box by pressing Windows + R. Type msinfo32 in the text area, and press OK.
15. GodMode
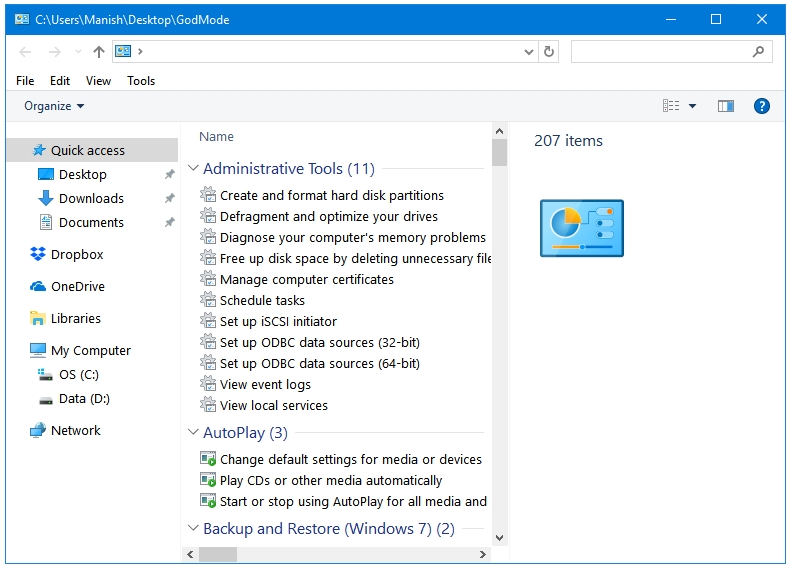
How could I not mention this one! Technically, the GodMode is not a tool but a folder that has shortcuts to various Windows tools, options, and features.
How to access: You have to create it. Create a new folder by right-clicking on the Desktop. Rename the new folder with the this text: GodMode.{ED7BA470-8E54-465E-825C-99712043E01C}