Safe Mode is a diagnostic Start Mode for Windows used mainly for troubleshooting. Safe Mode loads only the essential drives and services required to boot Windows. None of the third-party drivers or startup programs and services is loaded in the Safe Mode.
Method 1: Through System Configuration utility
Step 1: Press the Windows key and R together to open the Run dialog box.

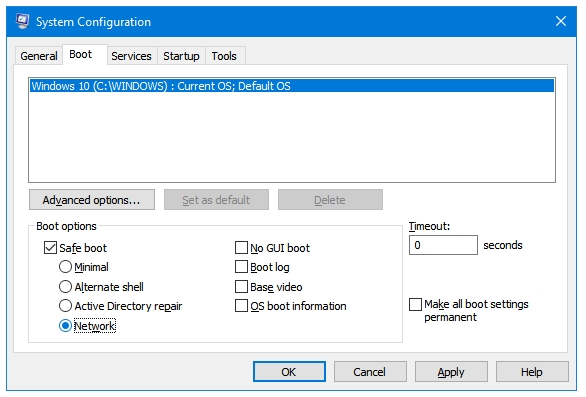
Step 2: Type the word msconfig in the text field, and press OK. This will open Microsoft’s System Configuration tool.
Step 3: Press the Boot tab to access Windows Boot options.

Step 4: In the Boot options section, tick the Safe boot checkbox.
There are four options under Safe boot – Minimal, Alternate shell, Active Directory repair, and Network.
Step 5: Select the Safe boot type that you want to use. Then Click Apply and then OK.
Step 6: Restart your computer to boot into Safe Mode.
Method 2: Through Recovery app
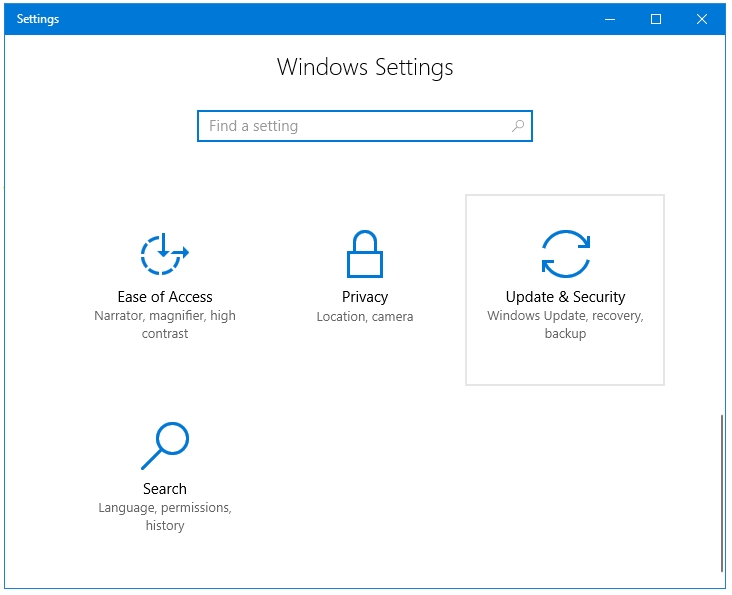
Step 1: Press Windows + L keys together to open the Windows Settings app.
Step 2: In Windows Settings window, Click on the Update & Security option.

Step 3: In Update & Security window, Click on the Recovery side tab.

Step 4: Under Advanced startup option, click on the Restart now button to restart your computer in the Windows Recovery Environment.
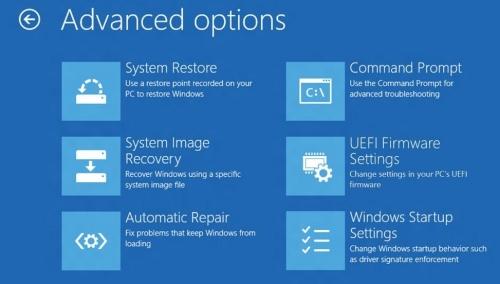
Step 5: When your PC restarts to the Choose an option screen, select Troubleshoot > Advanced options > Windows Startup Settings > Restart. This will restart your PC.


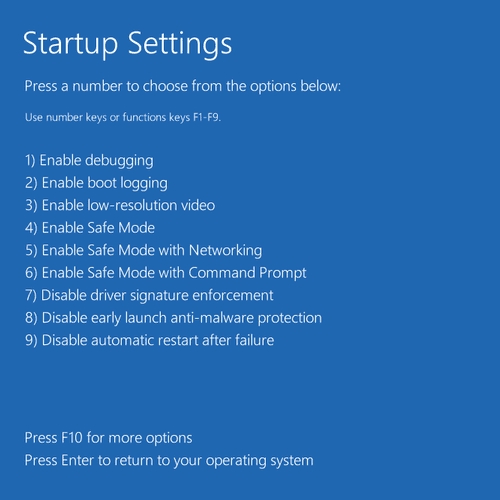
Step 6: When you PC restarts, you’ll see a screen with various types of diagnostic startup modes, you can select any one of them using the Function keys. Select F4 to boot you PC in Safe Mode, or select F5 to boot you PC in Safe Mode with Networking.
Method 3: Using Shift + Restart combination
Step 1: Get to the sign-in screen of your computer by using either of these two methods – Restart your computer, or press Windows + L keys together to lock your computer.
Step 2: In the sign-in screen, click on the Power icon at the bottom-right of the screen.

Step 3: Click on the Restart option while clicking the Shift key. This will reboot your PC in Safe Mode.
Step 4: When you PC restarts, you’ll see a screen with various types of diagnostic startup modes, you can select any one of them using the Function keys. Select F4 to boot you PC in Safe Mode, or select F5 to boot you PC in Safe Mode with Networking.
The above three methods do not require any other removable media. However, if your Windows is unbootable, and you need to get into Safe Mode, and the Automatic repair is also not working then try the following two methods.
Method 4: Using Windows Recovery Drive
Step 1: For this method, you need to have a Windows Recovery Drive that you previously created. Boot your computer with the Windows Recovery Drive.
Step 2: Select you Keyboard language.
Step 3: Next, you reach the Choose an option screen. From here on, follow Method 2’s Step 5 and 6 to boot into Safe Mode.
Method 5: Using Windows DVD/USB
For this method, you need to have a Windows Recovery Drive that you previously created

Step 1: Boot your computer with the Windows DVD or USB.

Step 2: Select your Language to install, Time and currency format, and Keyboard or input method. Keyboard language. Press Next.

Step 3: In the next screen, you’ll see a big Install now button. At the bottom-left of this screen, there is another option called Repair your computer. Clicking on it will take you to the Choose an option window. From here on, follow Method 2’s Step 5 and 6 to boot into Safe Mode.