Change the Size of Pagefile or Virtual Memory in Windows
The Paging file or Virtual Memory can be configured by navigating to the Advanced Performance Options.
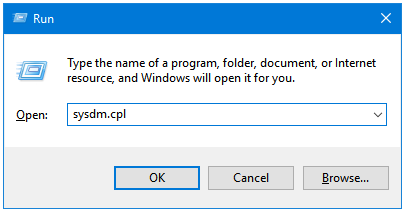
Step 1: Open the Run dialog box. Type sysdm.cpl in the text field, and then press OK. It’ll open the System Properties window.
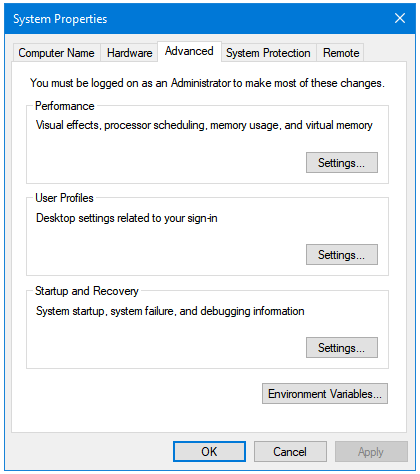
Step 2: In the System Properties window, click on the Advanced tab. Next, click on the Settings button in the Performance section to open the Performance Options window.
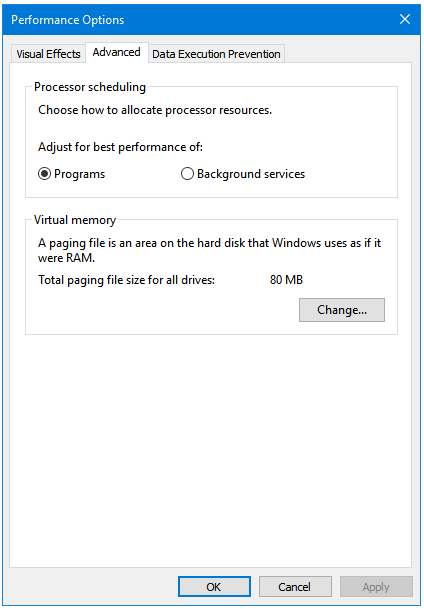
Step 3: In the Performance Options window, click on the Advanced tab. Under the Virtual memory section, click on the Change button.
Step 4: The first option here is Automatically manage paging file size for all drives. If this option is selected then all of the other options are greyed out, and Windows configures the Paging file or Virtual Memory related settings automatically for all of the partitions.
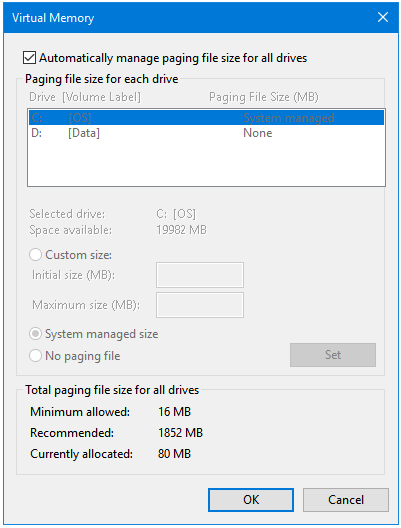
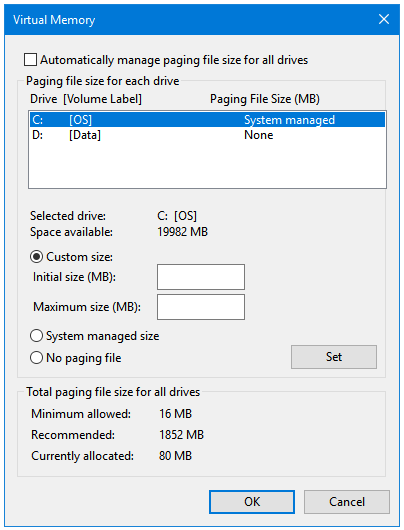
Unticking the Automatically manage paging file size for all drives checkbox lets you manually configure the Paging file or Virtual Memory related settings.
You have three options to choose from:
- Custom size
- System managed size
- No paging file
Custom size
The Custom size option lets the user specify custom paging file size limits. You need to enter two sizes – Initial size, and Maximum size.
The Initial size is the disk space reserved by Windows for the purpose of paging. The optimal setting for Initial size can be adjusted according to your Peak usage. If you are low on disk space then you can set the Minimum allowed size specified by the Windows itself.
The Maximum size should be 1.0 to 1.5 times the size of the installed RAM.
There is only one benefit of using the same size for both Initial and Maximum size, and that benefit is that the size mentioned in Initial size is always reserved by Windows, and no other system or user files are moved in or out of that disk space, hence there will not be any defragmentation on that disk space. On the other hand, using two different sizes could cause fragmentation over time.
System managed size
When you select this option, Windows does all the maths, and manages the paging file accordingly. Using the System managed size option is similar to the Automatically manage paging file size for all drives option. The only difference here is that now you can use different settings for each partition whereas the other option manages settings for all of the partitions.
No paging file
Windows does not use any paging file. In this case, whenever the total memory required by programs is more than the total available memory, programs start to crash. Windows starts displaying errors for each program that is about to crash. The error message that says Your computer is low on memory is caused by this issue only.
Step 5: Click on the OK button after making the desired changes.
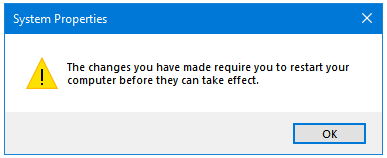
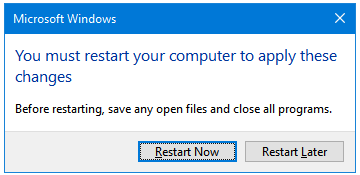
Step 6: Restart your computer to implement the changes.